Custom Attributes

Beefree App is now RGE Studio!
The email design suite you already know and love just leveled up. We’re working hard to update our help center, but you still may see some references to the old product name.
This article applies to the Enterprise plan.
Overview
Custom attributes let you add user-defined HTML attributes to elements in your designs. Use them to pass data to third-party platforms and tools. This includes CRMs and analytics tools. This works without changing your core HTML structure. Some platforms may require specific custom attributes for integration.
Prerequisites
Your role in RGE Studio determines what you can do with custom attributes:
- Owners, Admins, and Managers can enable and manage attributes.
- Editors and Contributors can use existing attributes in the builder.
Link and Tag attributes
In RGE Studio, custom attributes have a target type: Link or Tag. The target type determines where the attribute applies in your HTML.
A Link attribute targets the <a> element, the HTML tag for hyperlinks. The attribute appears in your exported HTML once you set a link.
When the link is set, the exported HTML includes the custom attribute. In the example below, the name of the attribute is data-custom-attribute:
<a href="https://example.com" data-custom-attribute="value">Click here</a>
A Tag attribute applies to the entire content block rather than a specific link.
For example, it adds the attribute to elements such as <img>. Again, the name of the attribute in the example below is data-custom-attribute:
<img src="image.jpg" data-custom-attribute="value" alt="Example Image">
While working with custom attributes, keep the following in mind:
- Custom attributes apply to buttons, images, GIFs, stickers, videos, links, social, icons, menus, and text (titles, lists, paragraphs).
- Attributes added from the builder apply only to that design. They don't carry over to your workspace.
- A custom attribute can be targeted as either a Link or a Tag, but not both.
- One content block can contain multiple custom attributes.
How to Use
First, enable custom attributes in your account settings. Then you can start using them in your designs.
Enabling Custom Attributes
-
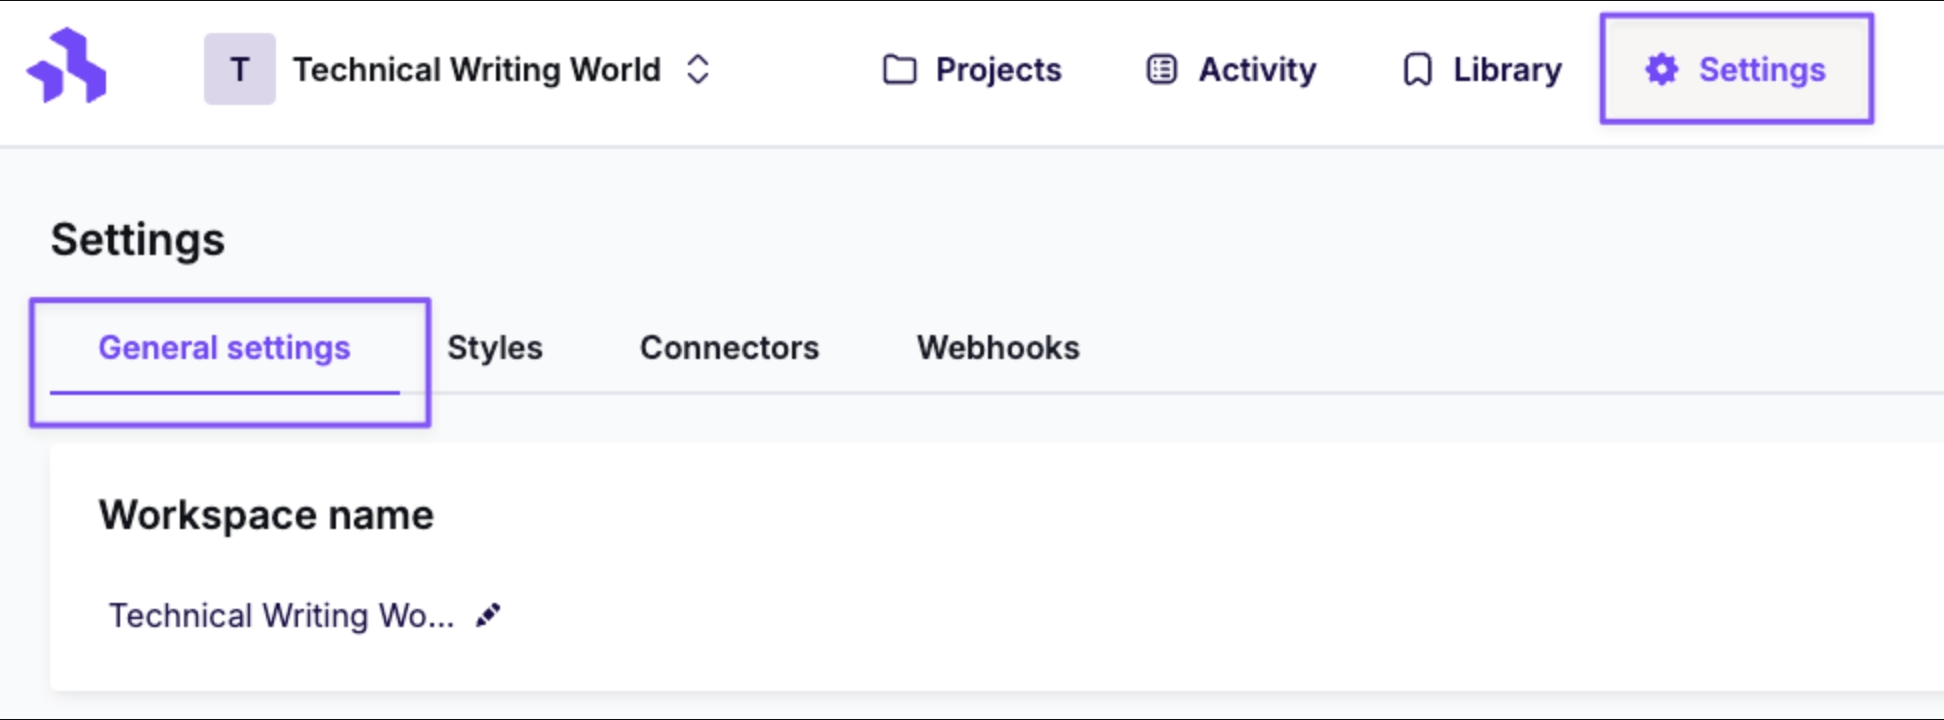
Navigate to Settings > General settings.
-
Locate the Enable custom attributes in the builder toggle under Builder preferences.

-
Turn the toggle ON.

Once enabled, you can start creating your custom attributes.
Adding Custom Attributes
There are a couple of different places where you can manage your custom attributes.
From Settings
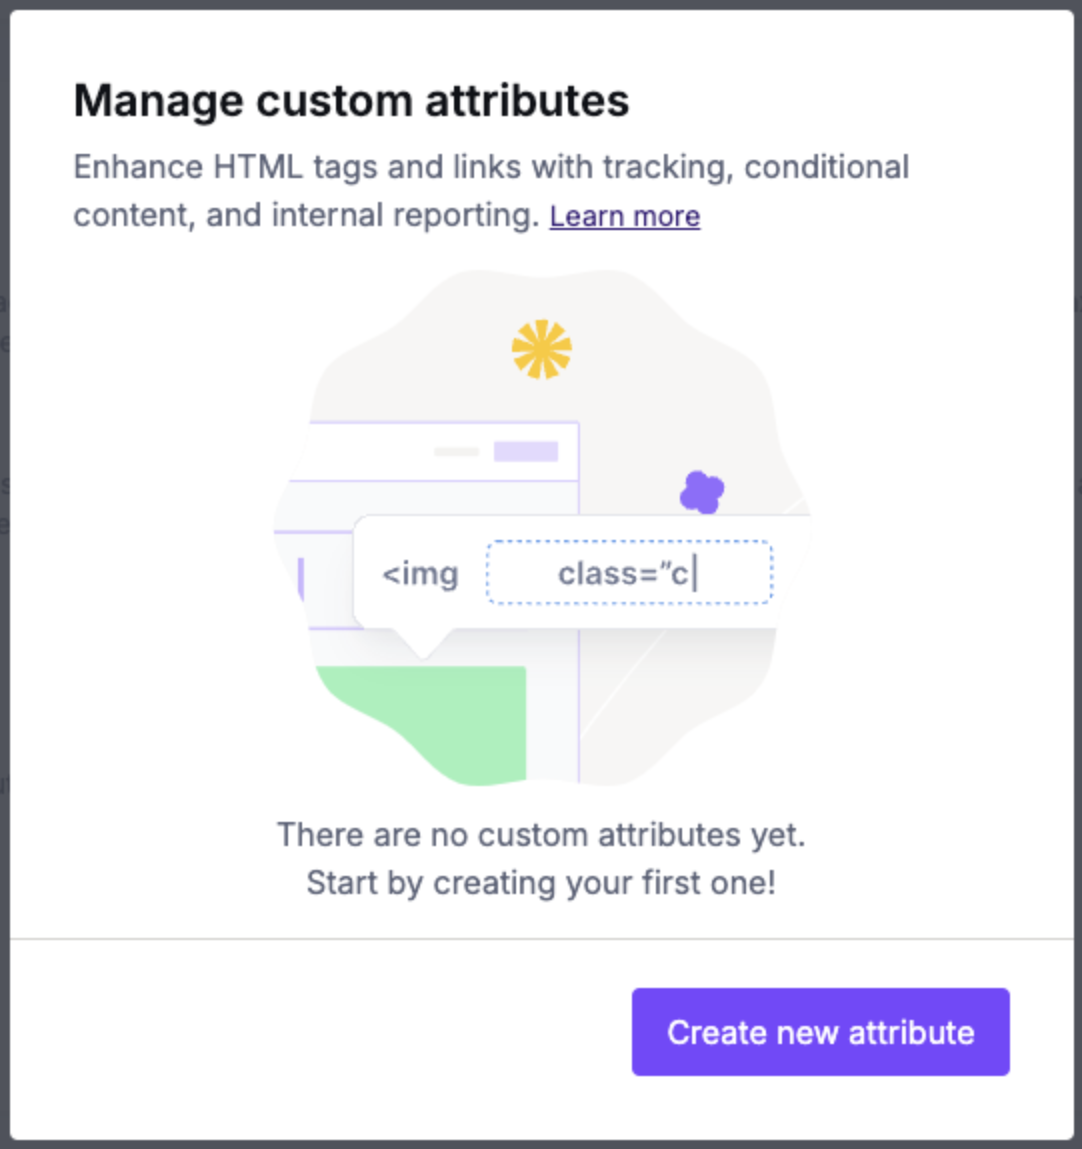
- Click Manage custom attributes.
- In the modal:
- Click Create new attribute.
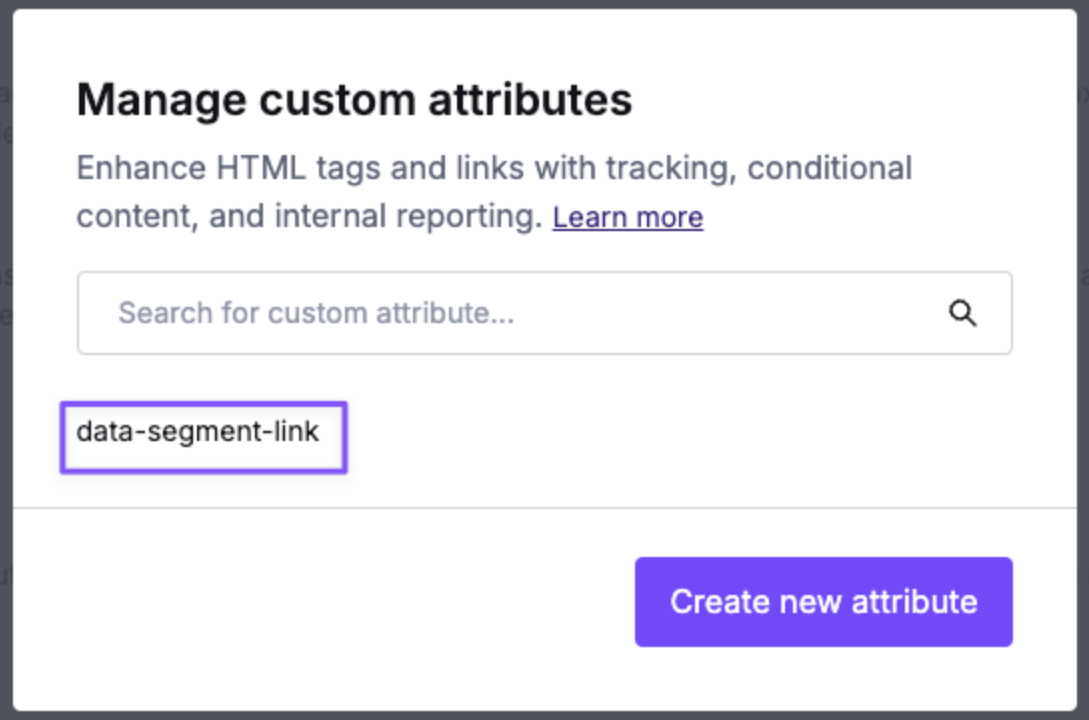
- Enter a Name (for example, data-segment-link).
- Enter a Value (if applicable).
- Choose a Target: Link or Tag.
-
Click Confirm.
-
The attributes are now available in the builder.
From the Builder Sidebar
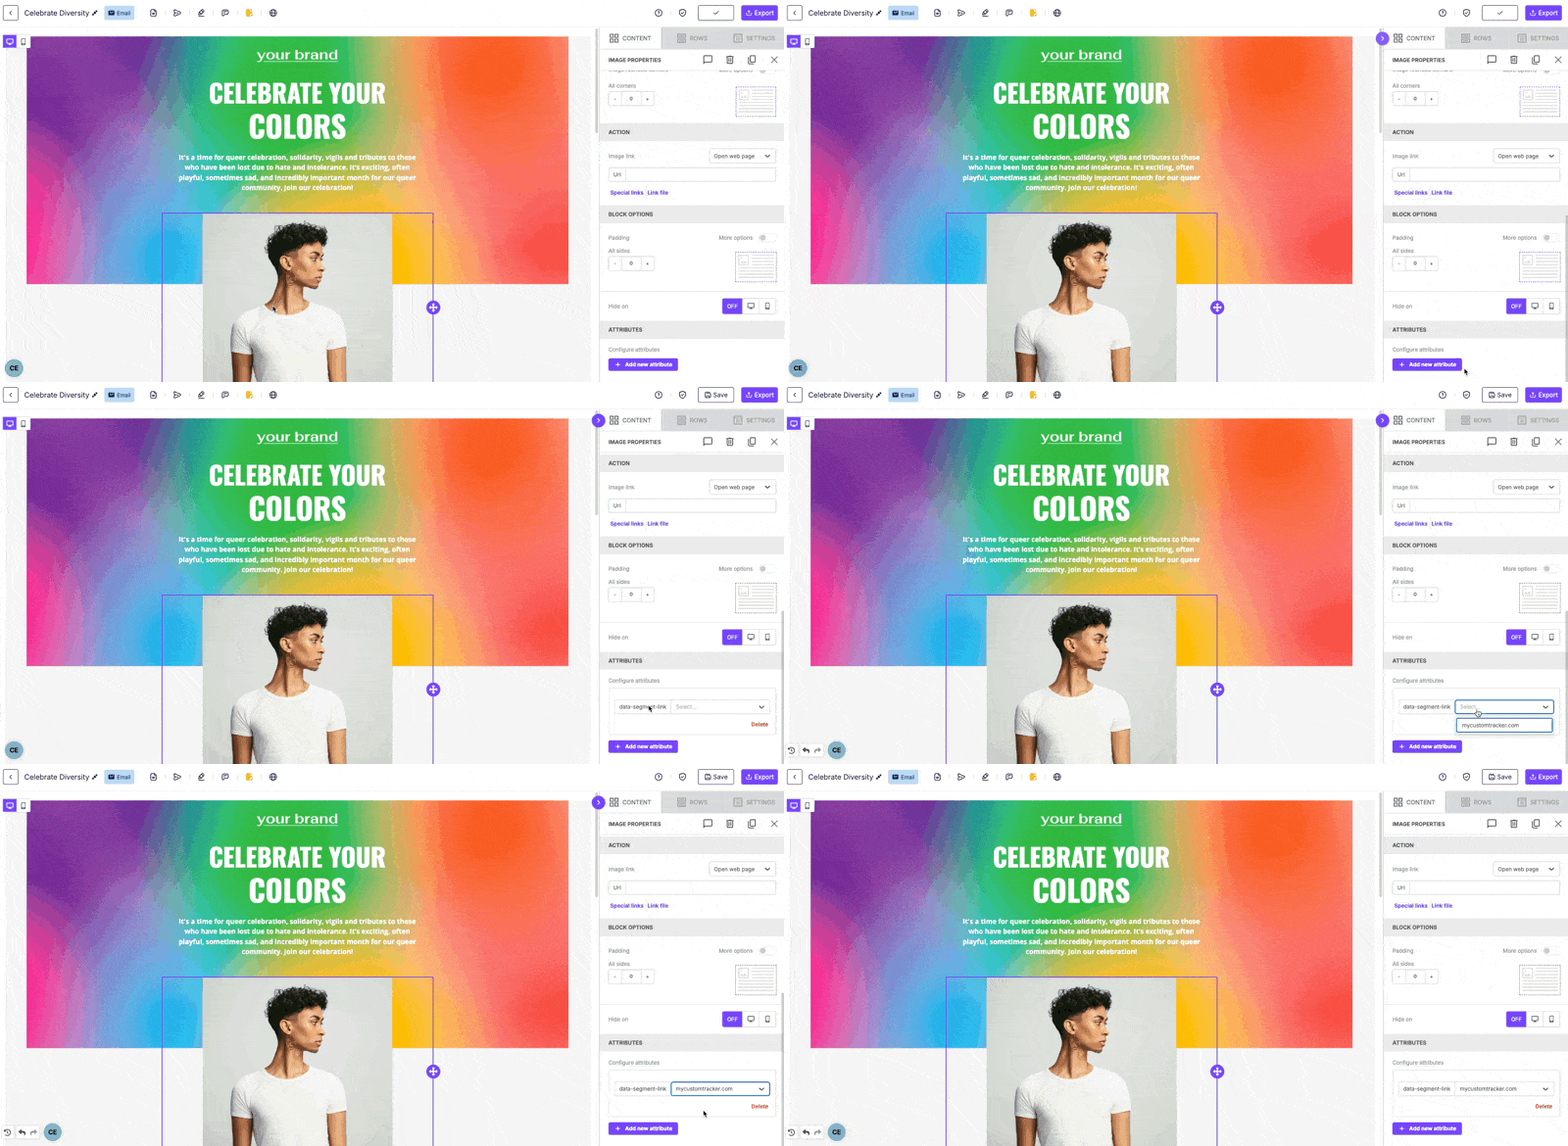
For most content blocks, custom attribute settings are found in the builder sidebar. Scroll to the bottom of the content block options.
- Select a content block that supports custom attributes.
- In the sidebar, locate the Attributes section.
- Click Add new attribute.
- Select an existing attribute or create a new one.
- Assign a value if required.
- Attributes are saved automatically when added.
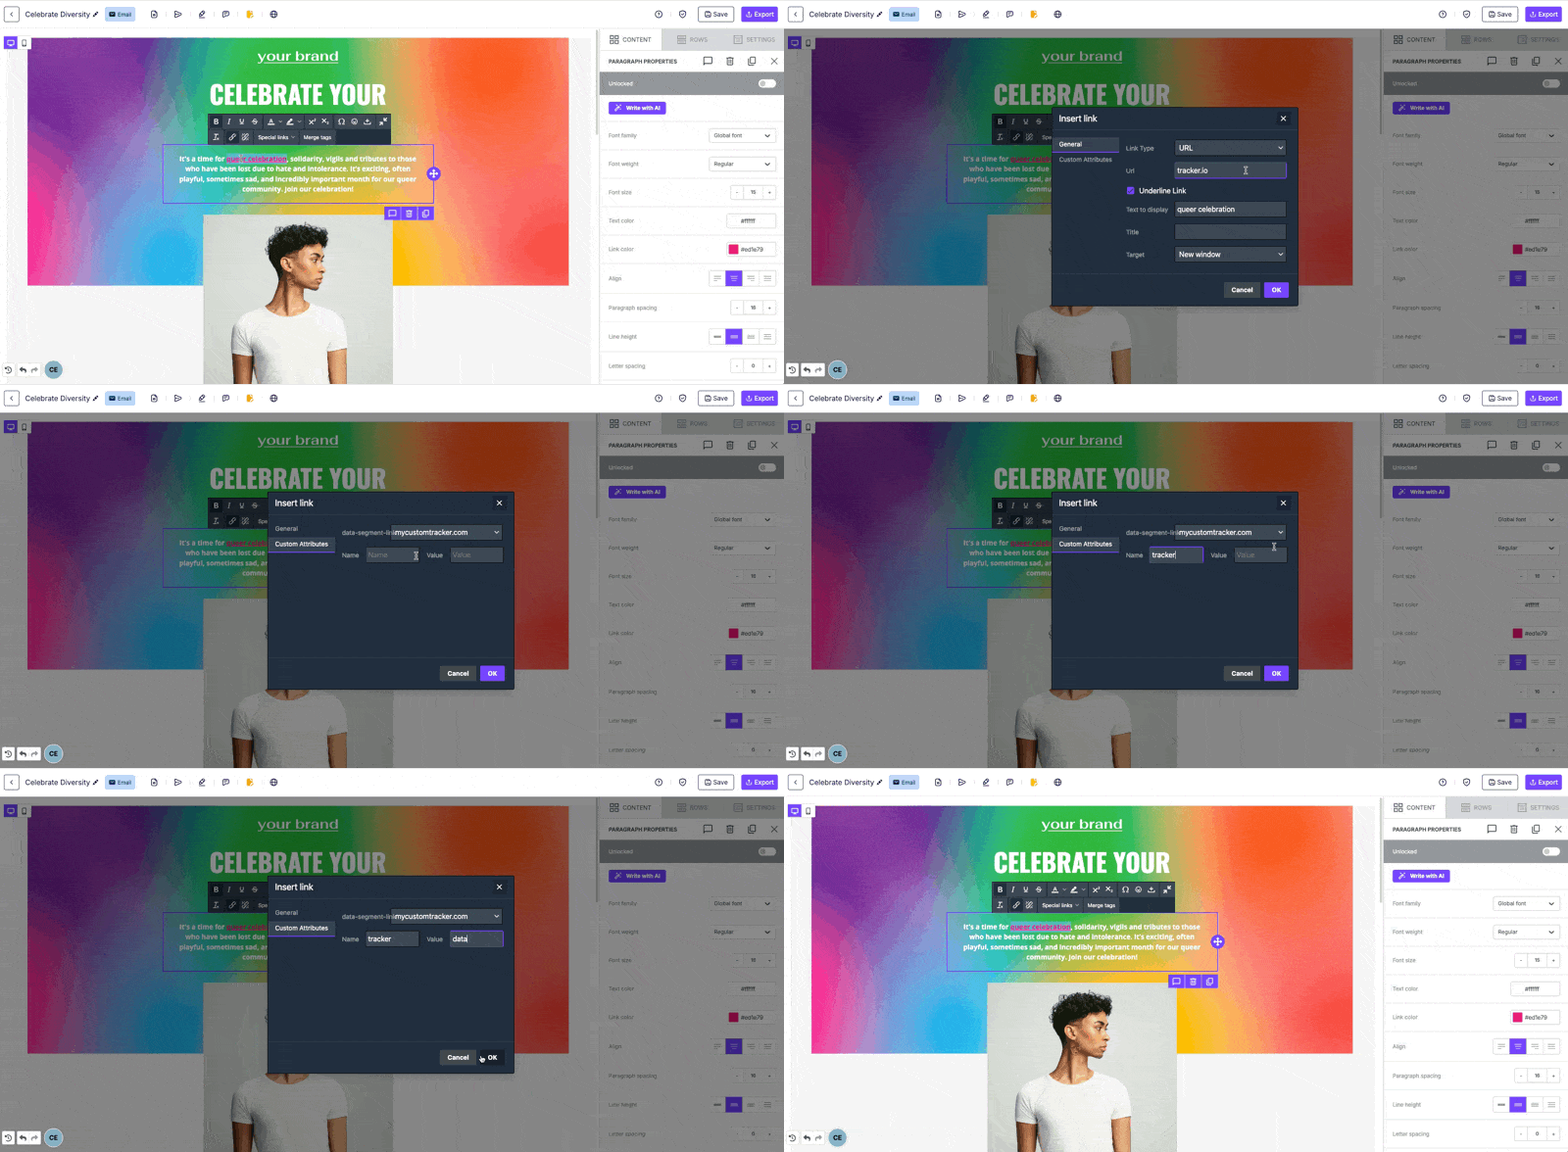
From Paragraphs, Lists, and Titles
To apply a custom attribute to text-based content, use the text toolbar.
- Highlight a text element (Title, List, or Paragraph).
- Click Add/Edit link in the toolbar (even if there is no link)
- Go to the Custom Attributes tab.
- Add a new custom attribute (same process as above).
Salesforce Marketing Cloud link aliases
You may use Salesforce Marketing Cloud (SFMC) as your email marketing platform. Custom attributes let you create link aliases in RGE Studio. A link alias is a descriptive label you assign to a URL. It lets you track clicks for that URL separately. This works even if you use the same URL more than once in an email.
Without an alias, SFMC merges click data for repeated URLs. Say you use the same link in a button, an image, and a footer line. SFMC combines the clicks for all three, so you can't tell which one drove them. Adding a unique alias to each link solves this.
To use link aliases in RGE Studio:
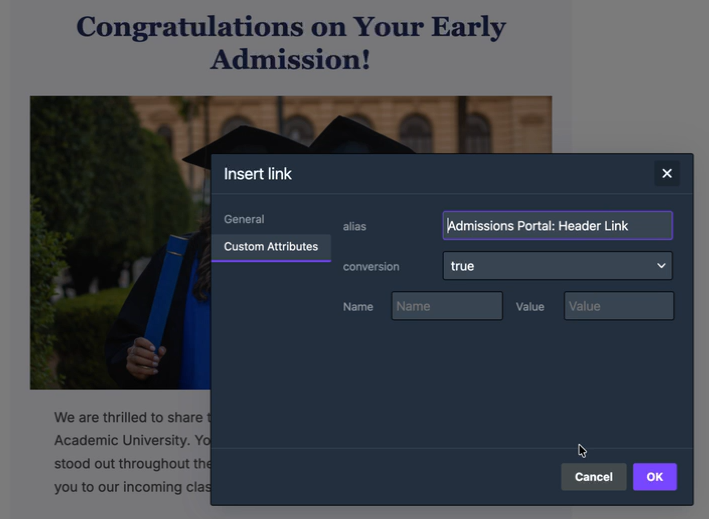
- Create a new Custom Attribute called "alias" with target type Link.
- When adding or editing a link, click Add Custom Attribute in the right-side property panel. You can also select Custom Attributes from the Insert Link window (shown below).
- Choose alias and assign a descriptive label.
- Your link is ready. RGE Studio tracks clicks on it separately in SFMC.
Important Considerations
- Downgrade Behavior: Custom attributes remain in designs but are not editable.
- Disabling the Feature: Attributes remain in designs but become hidden in Settings.
- Multiple Attributes: A content block can have more than one attribute.
- Duplicate attribute names: When two or more custom attributes share the same name, only the most recently created attribute appears in the builder.
If you have any questions, feel free to contact us.
Comments
0 comments
Please sign in to leave a comment.