Exporting to Veeva Vault

Beefree App is now RGE Studio!
The email design suite you already know and love just leveled up. We’re working hard to update our help center, but you still may see some references to the old product name.
The connector is no longer actively maintained, but it will continue to function as usual for the time being. However, please note that we are no longer able to provide support for issues related to the connector.
Level Up your Emails in Veeva Vault
You can easily design your emails in the RGE Studio builder and then push them to Veeva Vault for sending. Our connector allows you to export an email to Veeva Vault with only one click.
Here are 2 ways that you can connect your Veeva Vault account in RGE Studio:
- From the Workspace Settings section: connect your Veeva Vault account before you start designing.
- From the Export options of your email.
Setting up a connector does not sync your designs with external services. If you update a design after exporting it, you must re-export to see the updates.
Follow the steps below or watch our RGE Studio Academy tutorial.
1. Connect from Workspace Settings
Go to Settings > Connectors.

Click the Connect button for Veeva Vault.

Fill out the information in the modal to begin setting up the connector. Please note that your Veeva Vault credentials are not stored in RGE Studio. They are just used to connect your accounts. Additionally, the connection between platforms will time out after some time. This occurs according to the Session Duration settings in your Veeva Vault account.
You can customize the length of time it takes for the time-out to occur. Navigate to Admin > Settings. The necessary option is found under Domain Settings. This action is only available for someone with the Domain Admin user setting. They also need a security profile granting the Admin: Domain Administration permission. Find full details in the following Veeva Vault documentation: https://platform.veevavault.help/en/lr/14691/#domain-information.
RGE Studio will provide a "Session expired" message when the connection times out.
2. Connect from Export
When your design is ready, click on the Export button found on the Email Details page. This option is also available from the actions menu for your email.
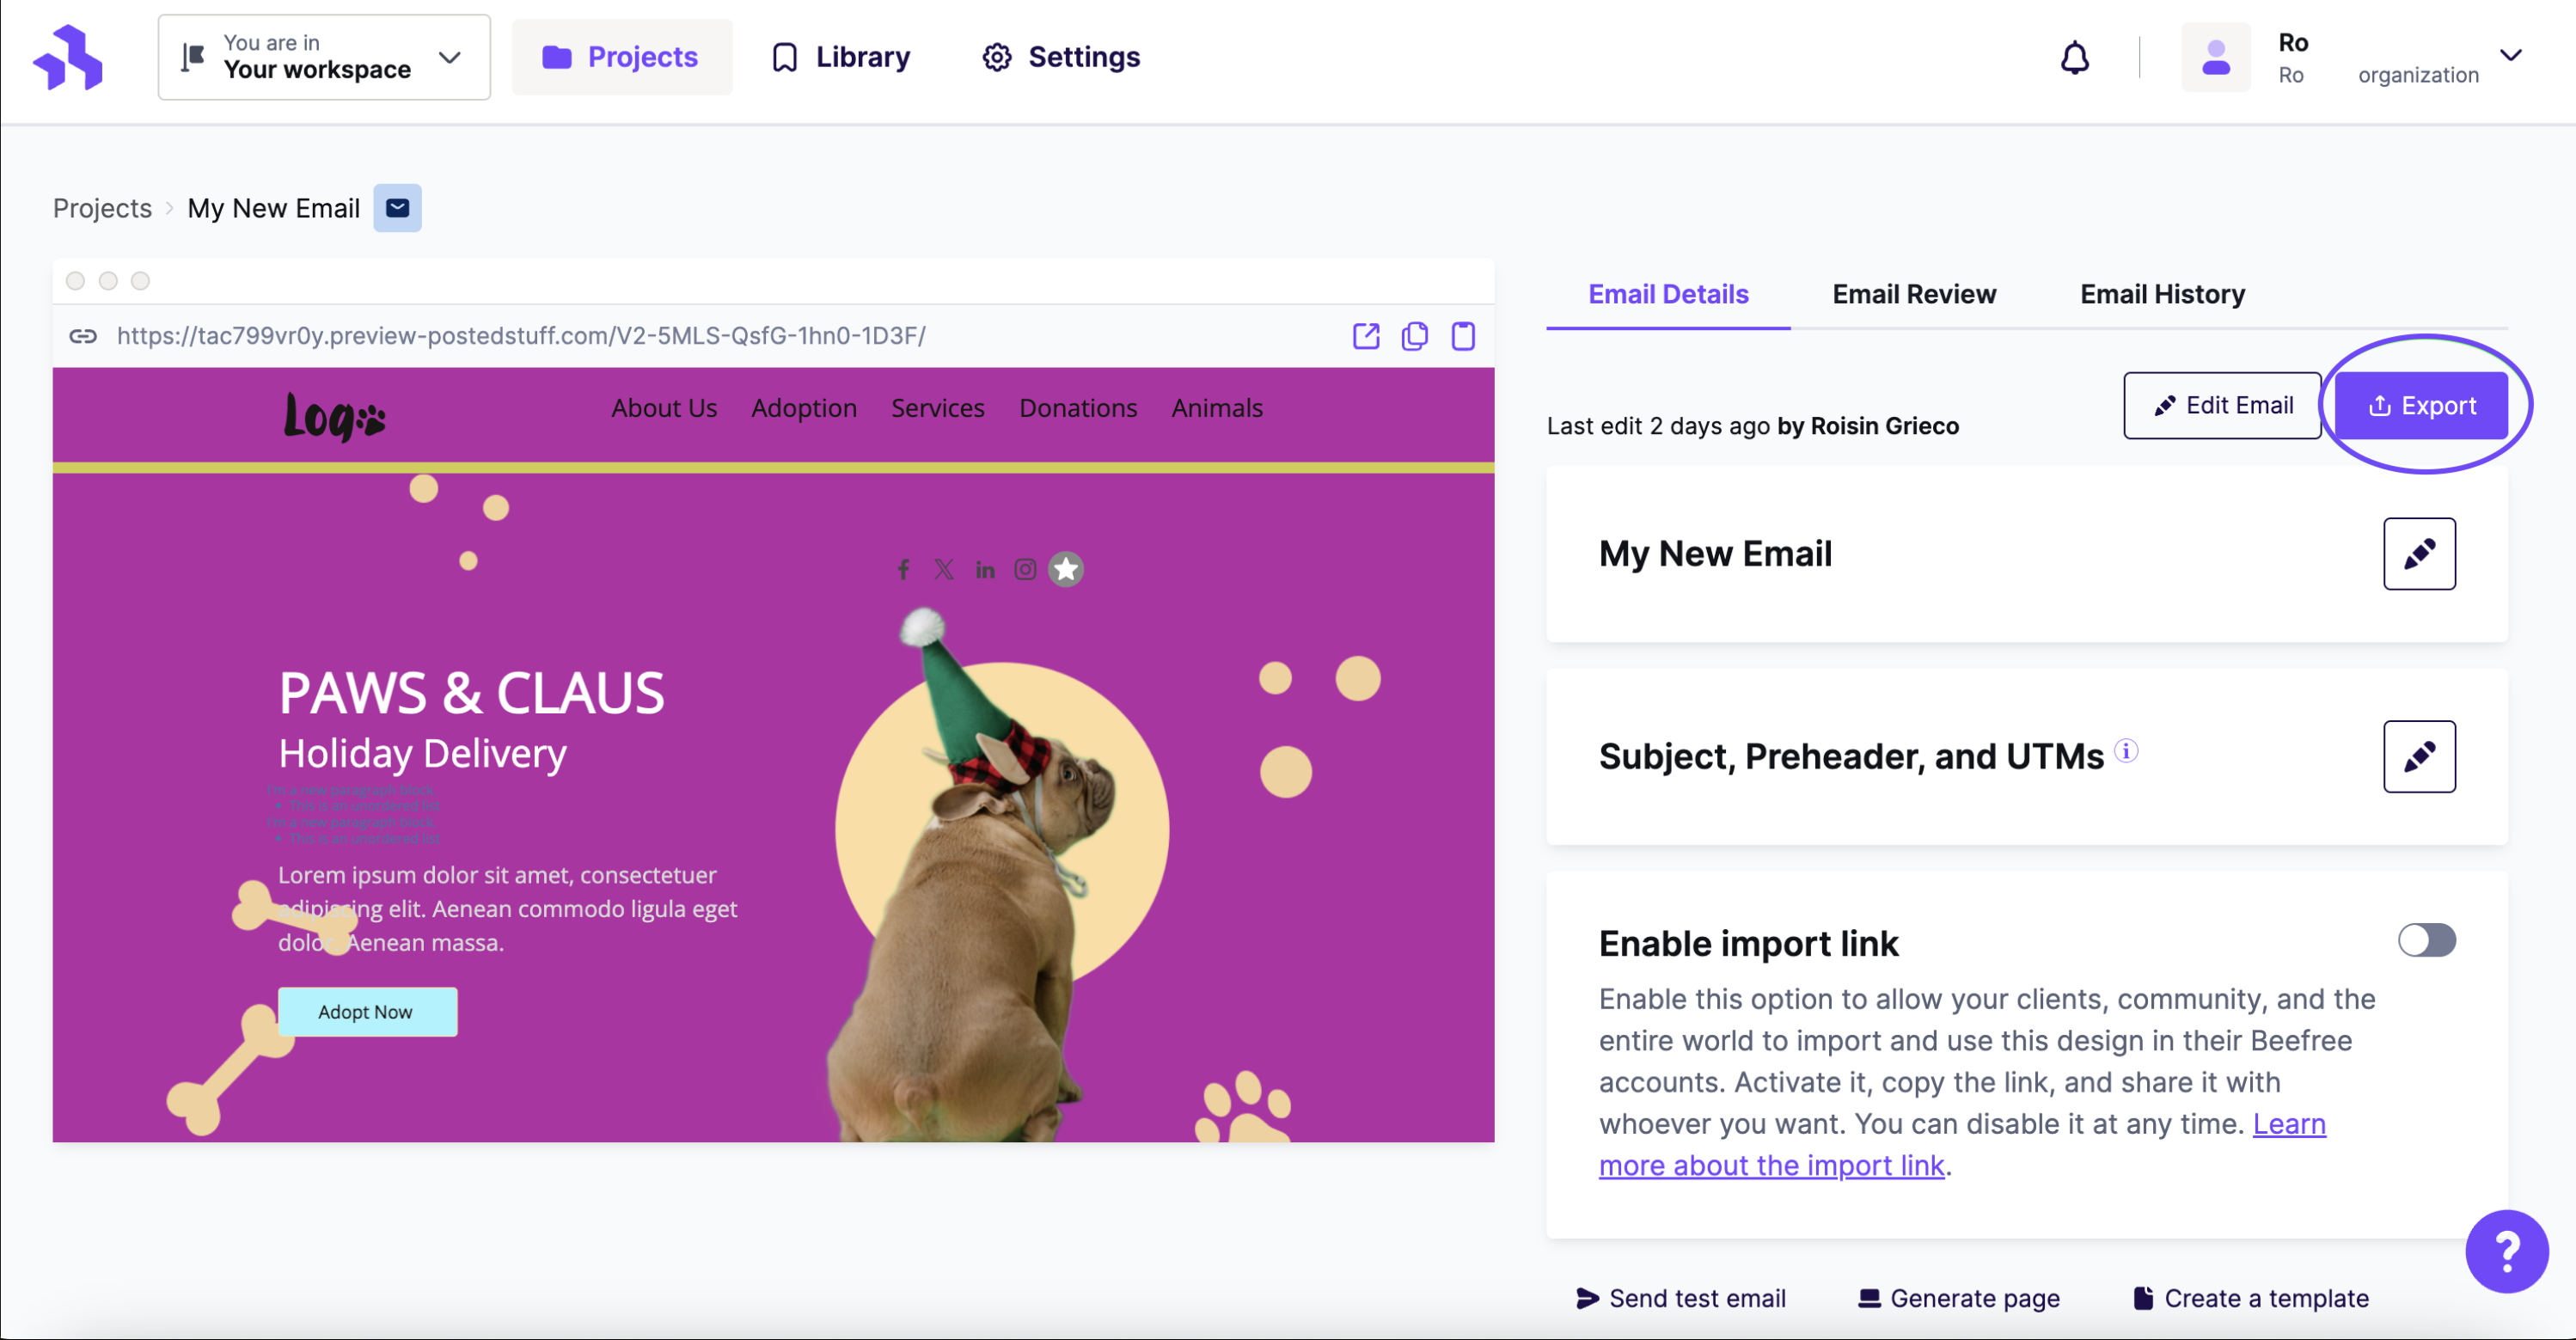
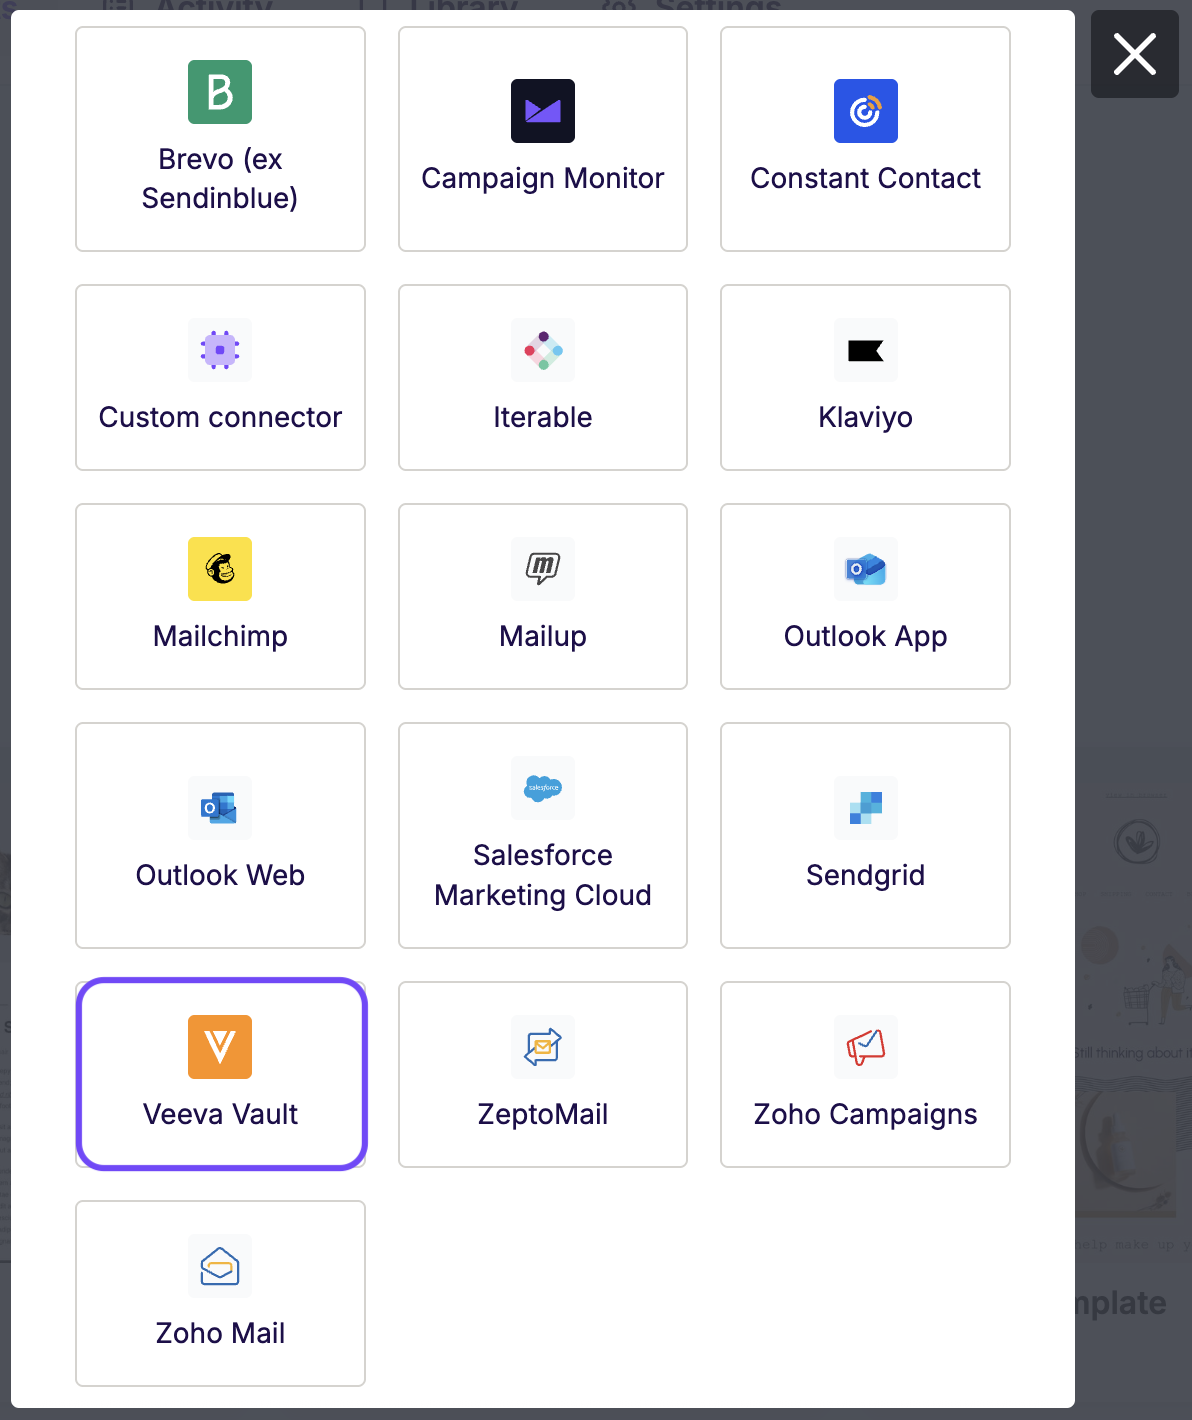
Click on the Integrations icon for Veeva Vault. If you don’t see it from this screen, click More to see all the connectors.
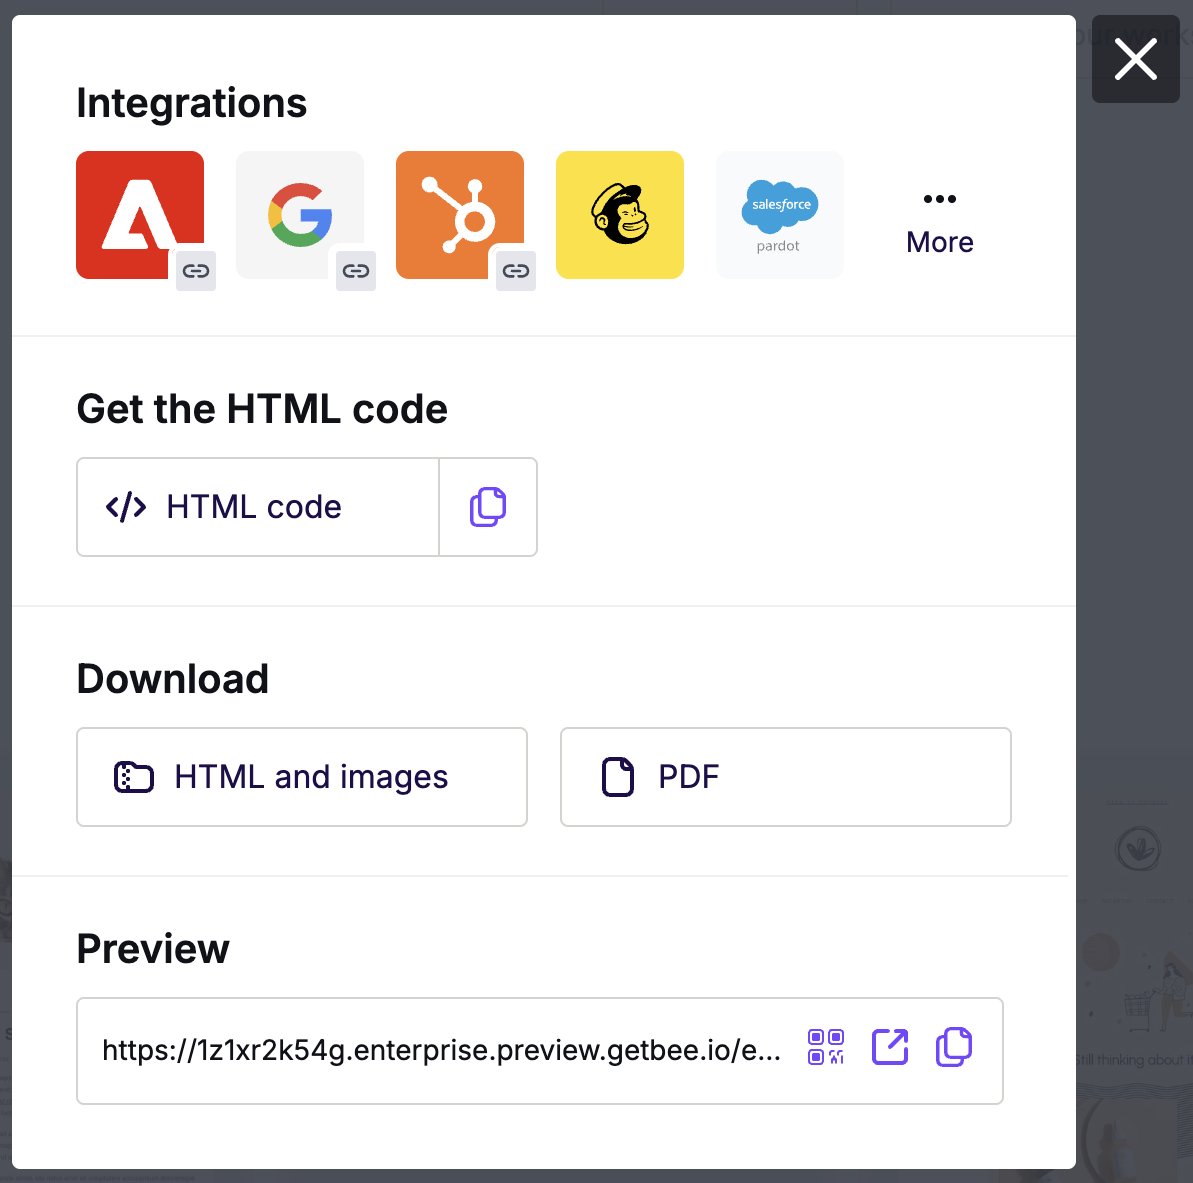
In the Integrations screen, scroll or search for Veeva Vault. Click on the icon and follow the steps to connect your accounts. If you have already connected, you will not be asked to do so again.
Veeva Vault requires some additional information for you to complete the export. Some of this information is required by Veeva Vault (name, from address, and subject.) You can also customize your Veeva Vault account to require custom information. We include all possible fields in the modal based on your Veeva Vault account settings.
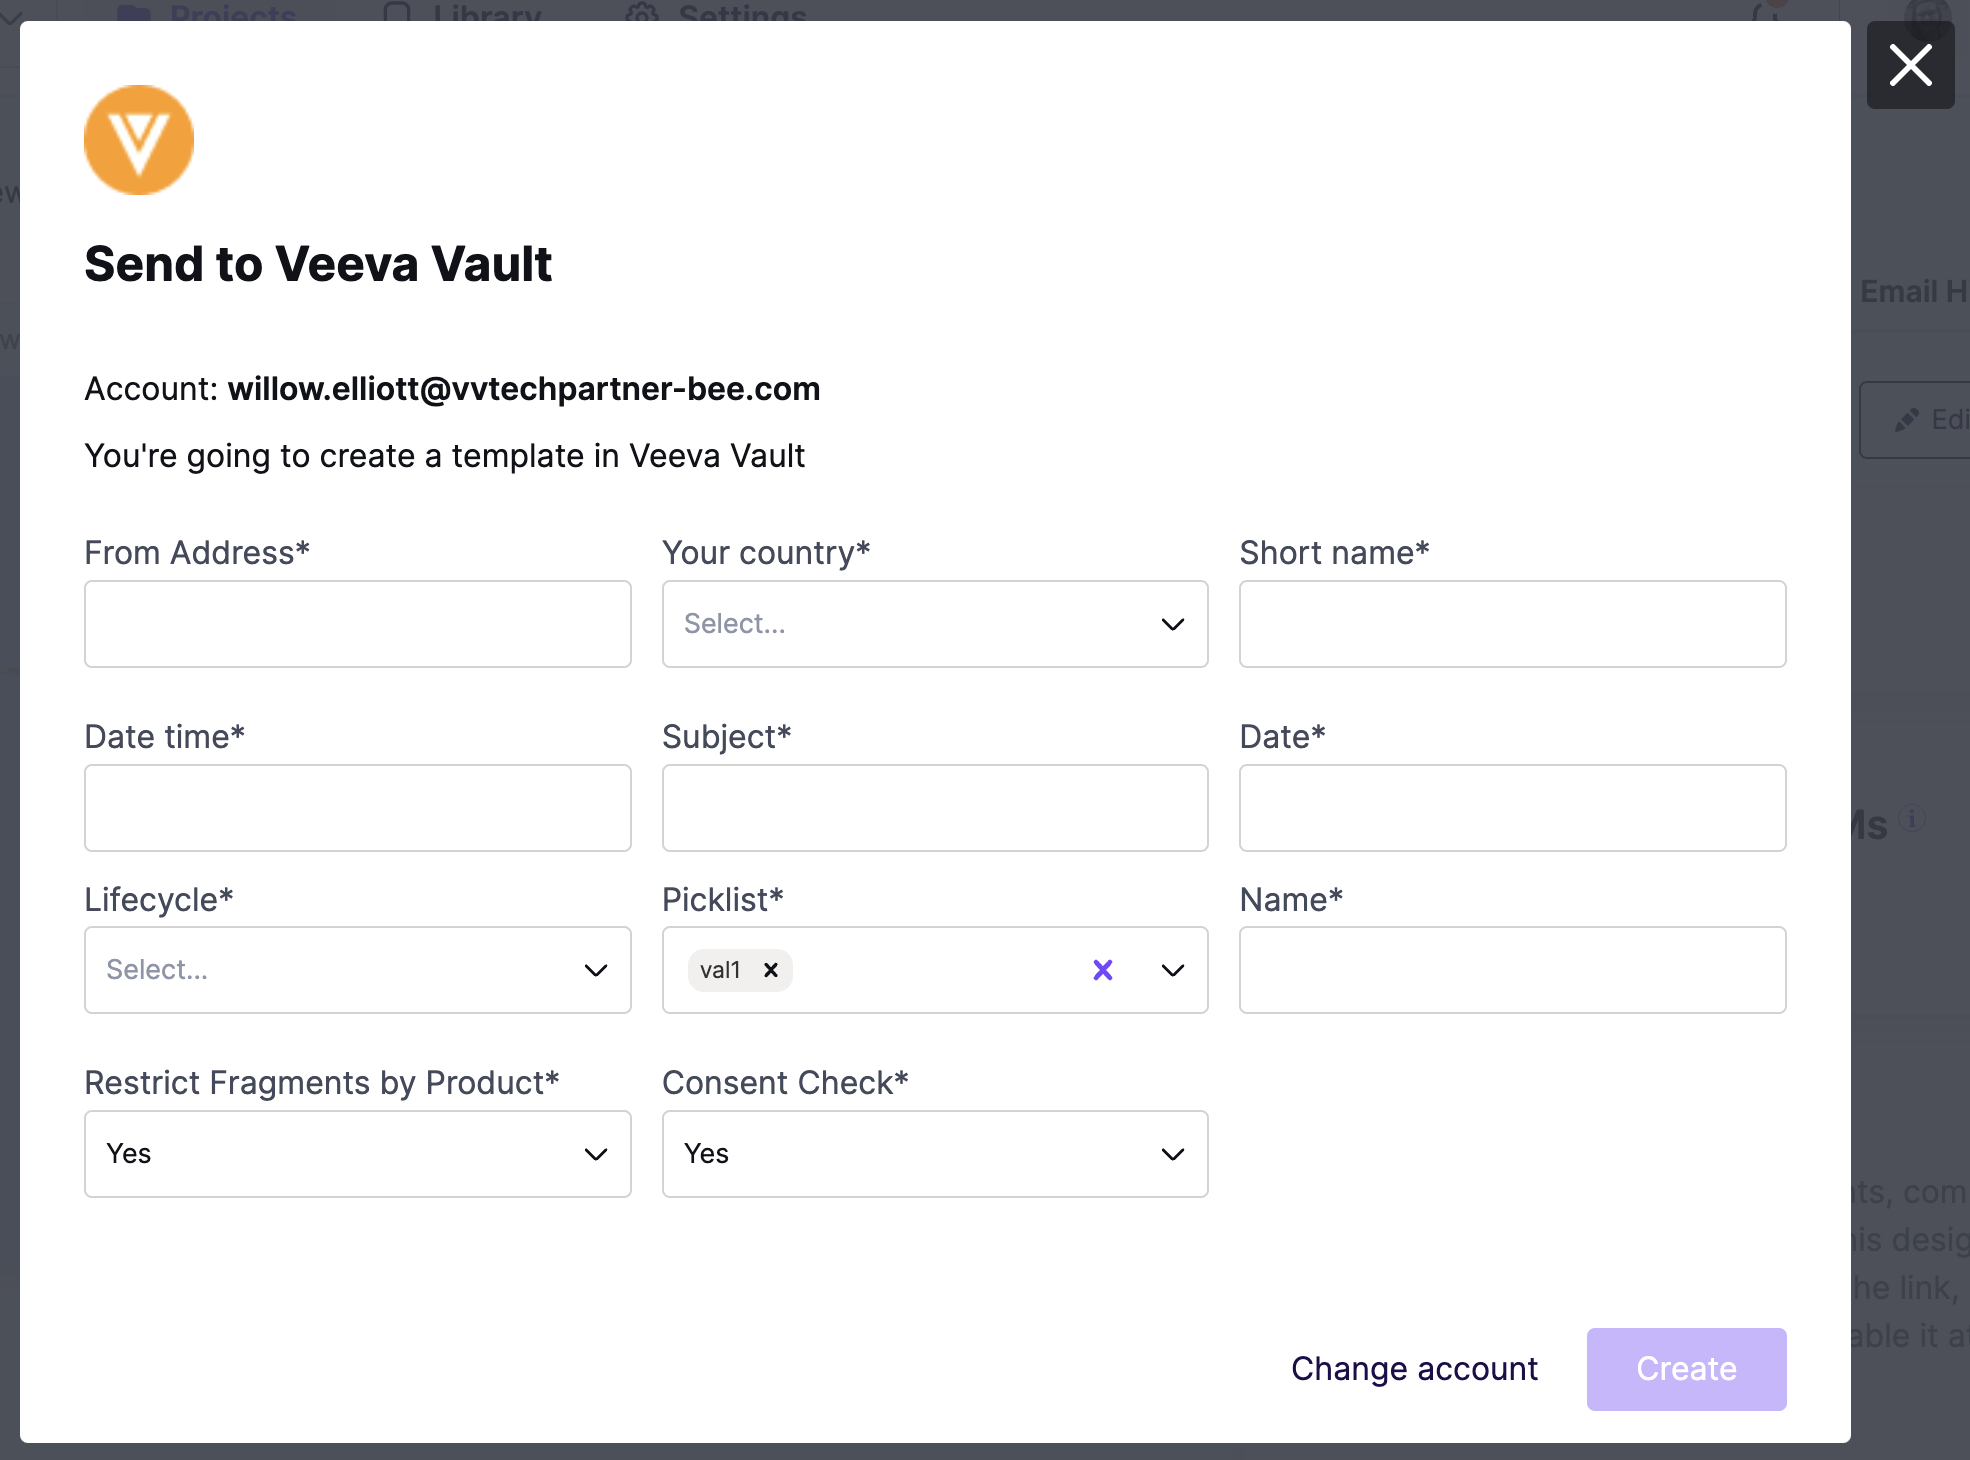
RGE Studio will confirm that the design has been successfully exported. You will see it appear in your Veeva Vault account.
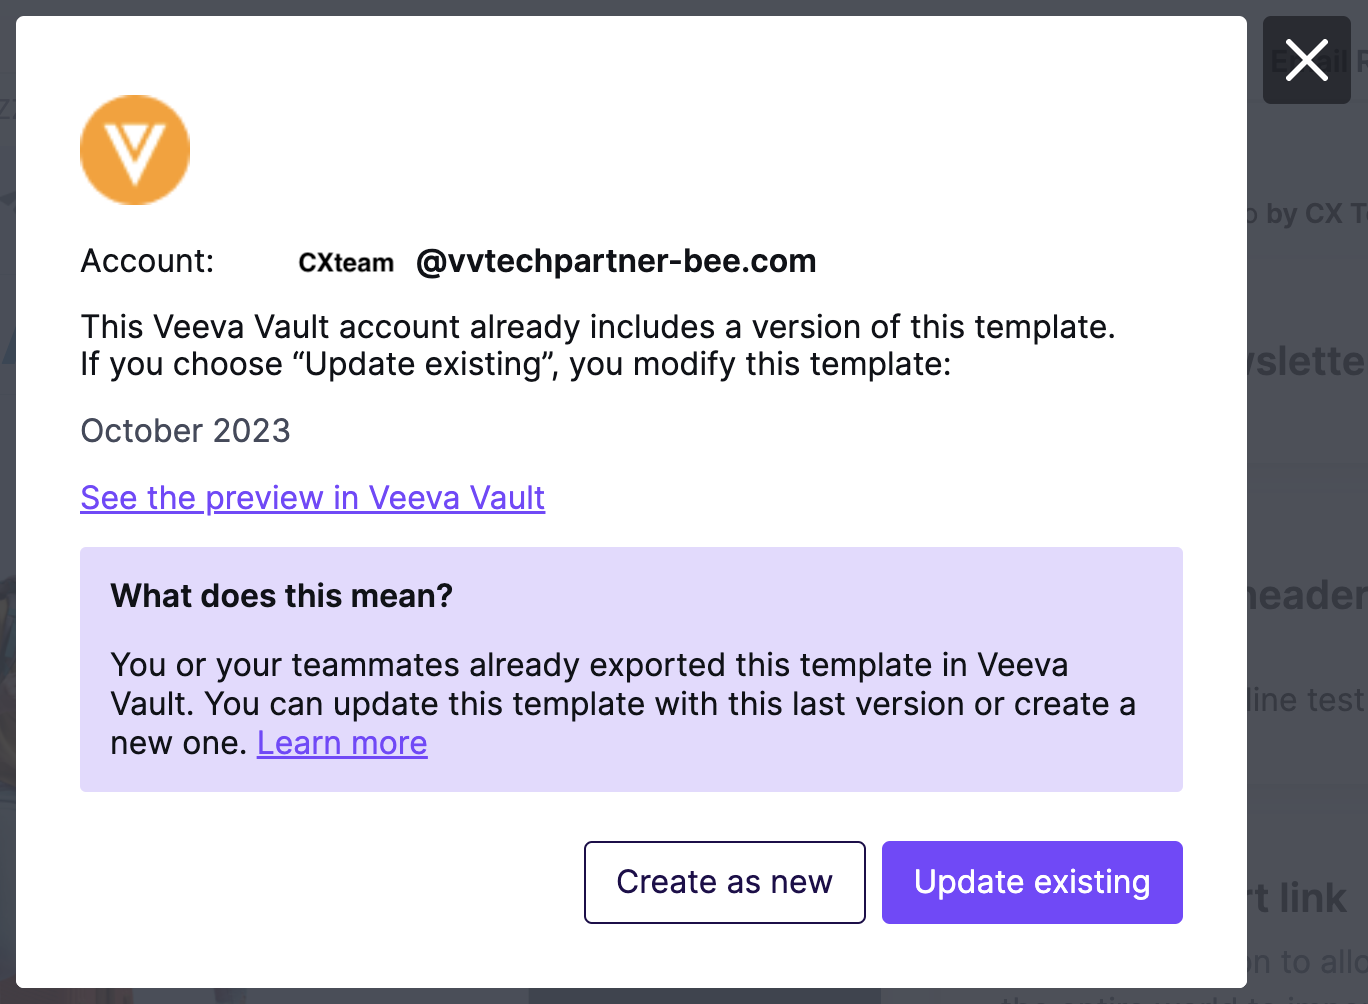
Exporting Existing Designs
If exporting an email that you've already pushed to Veeva Vault, RGE Studio will recognize this. You will not be required to re-enter information about the email you're exporting. You can update the existing version in Veeva Vault using the Update existing option. This export option will overwrite the existing version. If you want to export a new version of your email instead, use Create as new.
You can also use the builder in Veeva Vault to make minor edits to the design you created in RGE Studio if necessary.
Exporting Images from RGE Studio to Veeva Vault
You can export images in your emails from RGE Studio directly to Veeva Vault, ensuring that your images are hosted in Veeva Vault while maintaining the same version of your email design across RGE Studio and Veeva Vault. This helps you adhere to Veeva Vault's license agreements by managing image assets within their environment.
How the Export Works
The export process handles images in the following way:
- When you export an email, RGE Studio generates an HTML file containing a URL link to a ZIP file, which includes all images used in the email.
- Veeva Vault downloads this ZIP file, hosting the images on their Content Delivery Network (CDN).
The image transfer happens in the background without requiring additional action on your end.
Managing Exported Images in Veeva Vault
Once the email is exported to Veeva Vault, you can easily download the images associated with the email:
-
From the Information Sidebar:
- Navigate to the "Assets" section.
- Click Download to retrieve the images.
-
From the Library:
- Select Options and choose Export All Files.
- You’ll receive an email shortly with a link to download a ZIP file containing all images and assets related to the exported email.
This provides an easy way to manage and download all email-related assets directly from Veeva Vault.
Limitations
Once the email is exported to Veeva Vault, it cannot be edited in the Veeva Vault environment. We are working on a solution to make this possible in the future.
Multiple Workspaces / Customers
Do you work with multiple brands or clients and need to easily manage all your emails and templates?
No problem! The Enterprise Version of RGE Studio allows you to set up different workspaces so you can better organize your email creation workflow. Enterprise allows you to specify different connectors for each workspace, so you never need to switch accounts.
For example, say you are a digital marketing agency with 10 clients that use Veeva Vault. With Enterprise, you will be able to create 10 workspaces in RGE Studio and connect each of them to their specific Veeva Vault account.
Looking for a different sending platform? You can check our complete list of connectors — or request a new one!
If you have any questions, feel free to contact us.
Comments
0 comments
Please sign in to leave a comment.