Using Display Conditions

Beefree App is now RGE Studio!
The email design suite you already know and love just leveled up. We’re working hard to update our help center, but you still may see some references to the old product name.
This article applies to both versions of the builder in paid plans.
Overview
The Display conditions feature allows for conditional statements in your designs.
Display conditions let you pick a condition, or write one from scratch, and apply it to a row. The row then shows different content based on the recipient.

For example, you might have a row that only shows for current users of a certain product. That row appears when the condition is true. You can hide the same row from subscribers who don't use the product. That row stays hidden when the condition is false.
The condition "is this a current user?" is something your sending platform looks up. RGE Studio has no way to know whether it's true. In RGE Studio, you apply the conditional statement to a row. Your sending platform then processes the HTML at send time and acts on the condition.
Getting Started
To use display conditions in your emails or pages, first enable the feature in your RGE Studio account. The toggle lives in Settings > General Settings. Scroll down to find it.
Only Owners, Admins, and Managers can manage display conditions in Workspace Settings. Other roles can see conditions in the builder sidebar but cannot edit them. For more information, see User roles & permissions.
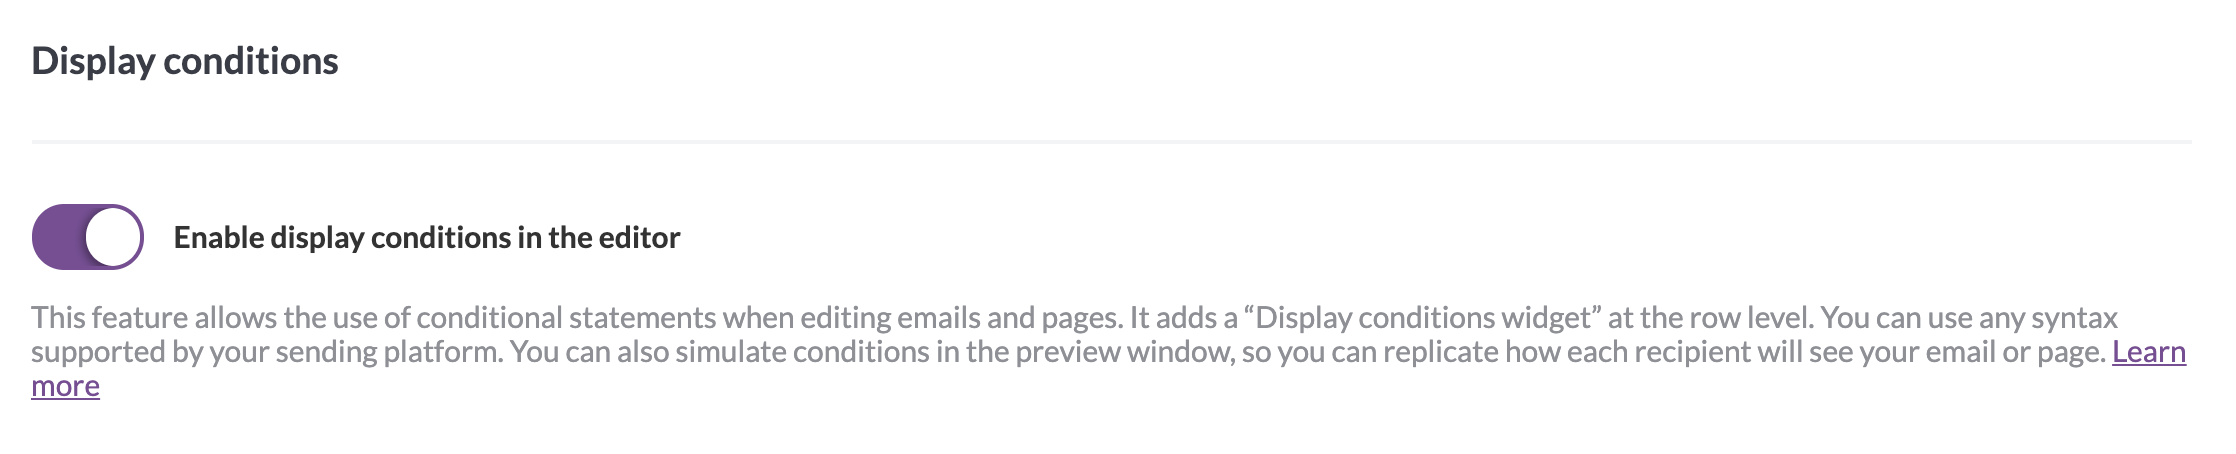
A purple toggle means display conditions are enabled. A colorless toggle means they are off. A confirmation message also appears in the lower right corner of the page.
Creating Display Conditions
Once display conditions are enabled, the setting appears in the builder sidebar under Row properties.
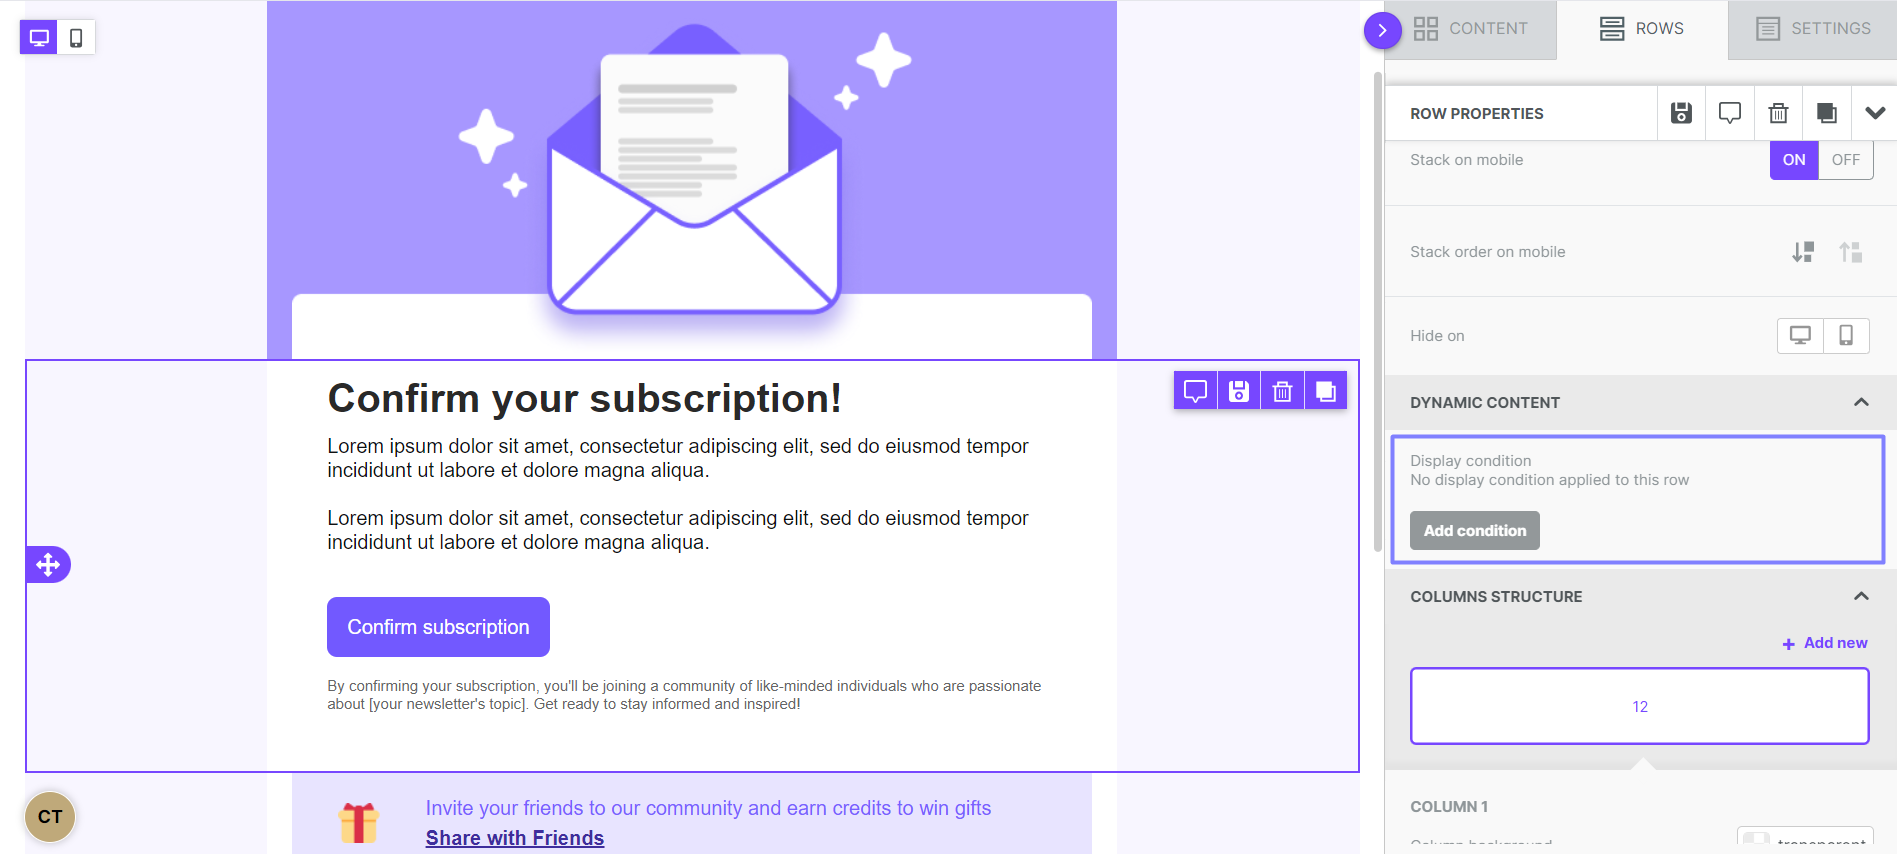
To add a display condition to a row, select Add condition. A modal opens over the builder stage.

Use the name and description fields to label what the condition does. You'll see this information later when previewing the design.
The before and after fields hold the conditional syntax that wraps your row. Only one of the two fields is required. You can fill in:
- Before only — opens a condition that another row will close.
- After only — closes a condition that another row opened.
- Before and after — opens and closes the condition within the same row.
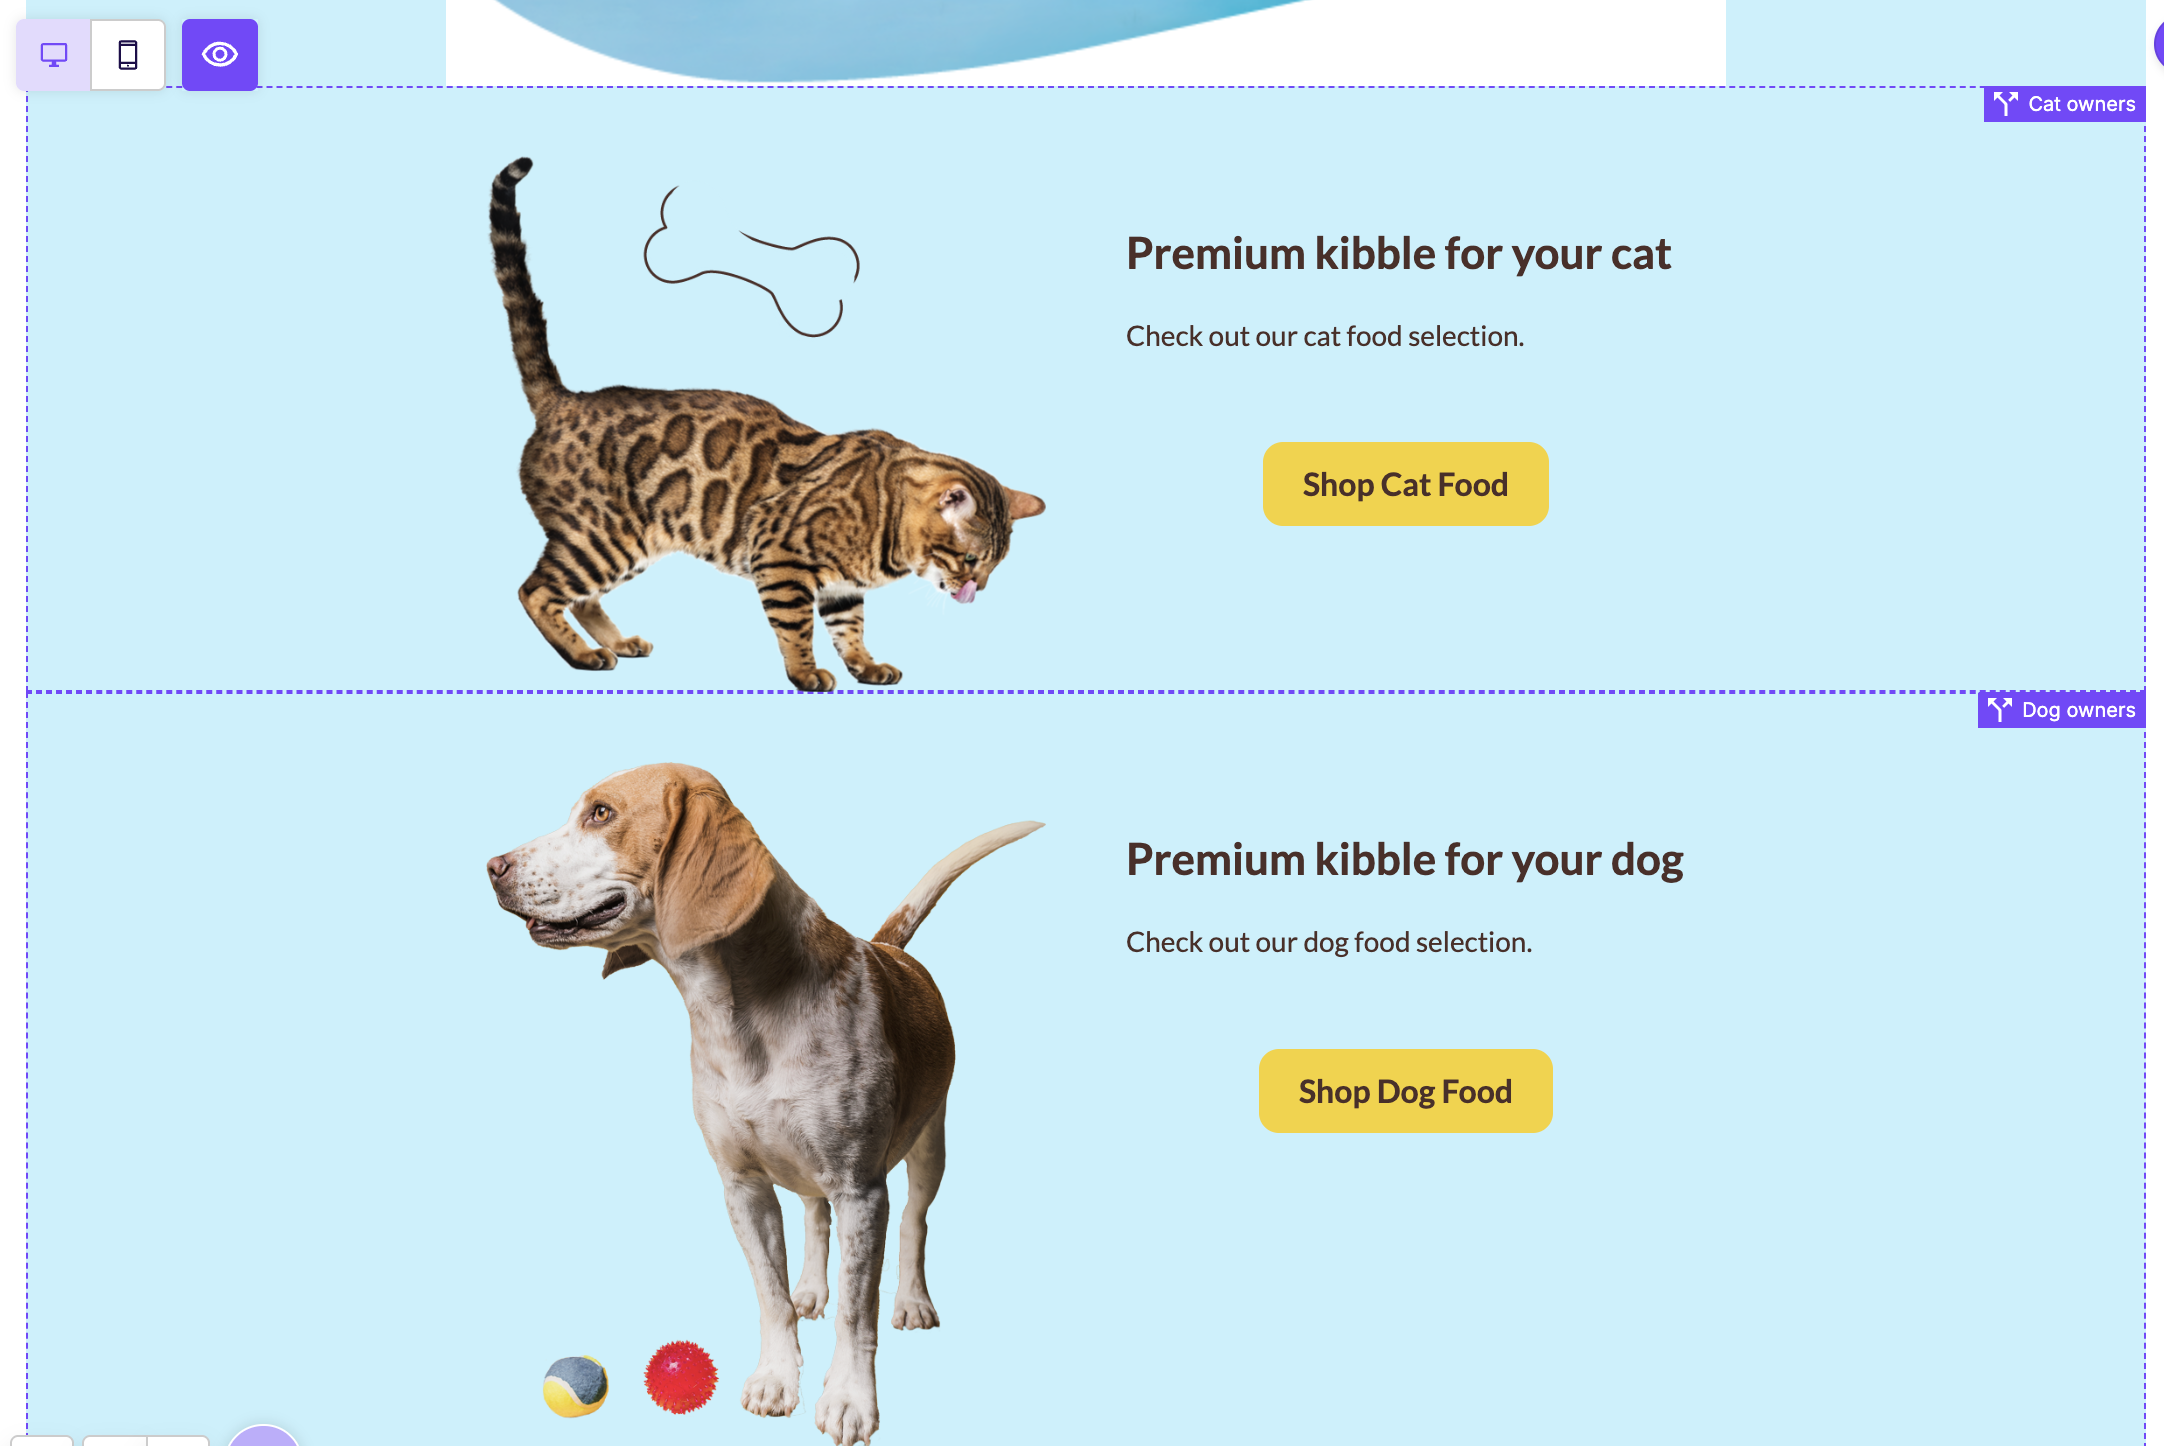
This means you can build IF / ELSE IF / ELSE logic across multiple rows. For example, a three-row pet food promotion might use:
- Row 1 (cat content) — Before:
{% if pet == "cat" %} - Row 2 (dog content) — Before:
{% elsif pet == "dog" %} - Row 3 (default content) — Before:
{% else %}, After:{% endif %}
RGE Studio does not add automatic END statements. Make sure each condition is properly closed.
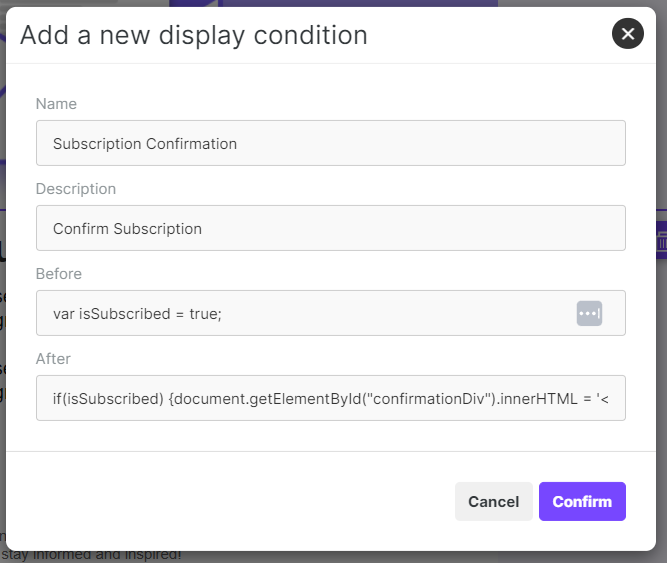
Select Confirm to save your condition. The display conditions section of the sidebar updates to reflect what you've added.
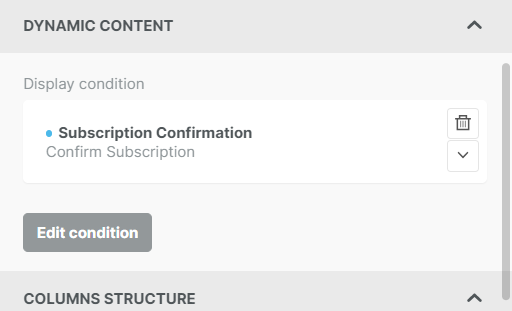
The delete icon removes the display condition. The icon below opens the popup again so you can review the statements. You can also Edit the condition at any time.
The builder does not store conditions for re-use. You fill out the form each time. The conditions you create are saved to the design they're attached to. You can carry conditions between designs by:
- Copying a design that includes display conditions
- Creating a design from a template that includes display conditions
- Saving a design as a template
Spotting Conditions in the Stage
When a row has a display condition applied, you'll see a dashed border around it in the editor stage. A label next to the row shows the condition's name.
The label is hidden when you select the row or a module inside it. This keeps the label out of your way while editing. On mobile, the label is replaced by a small icon to save space.
You can show or hide the dashed borders and labels using the visibility toggle in the upper-left corner of the stage. With the visibility toggle on, indicators appear on rows that have display conditions. With the visibility toggle off, indicators are hidden, and any rows hidden from a device are also hidden. Learn more about the visibility toggle.
Previewing Display Conditions
To preview how your design will look once conditions are evaluated, open the Actions dropdown and select Preview. The Preview navigation bar includes a dropdown called Select row conditions.
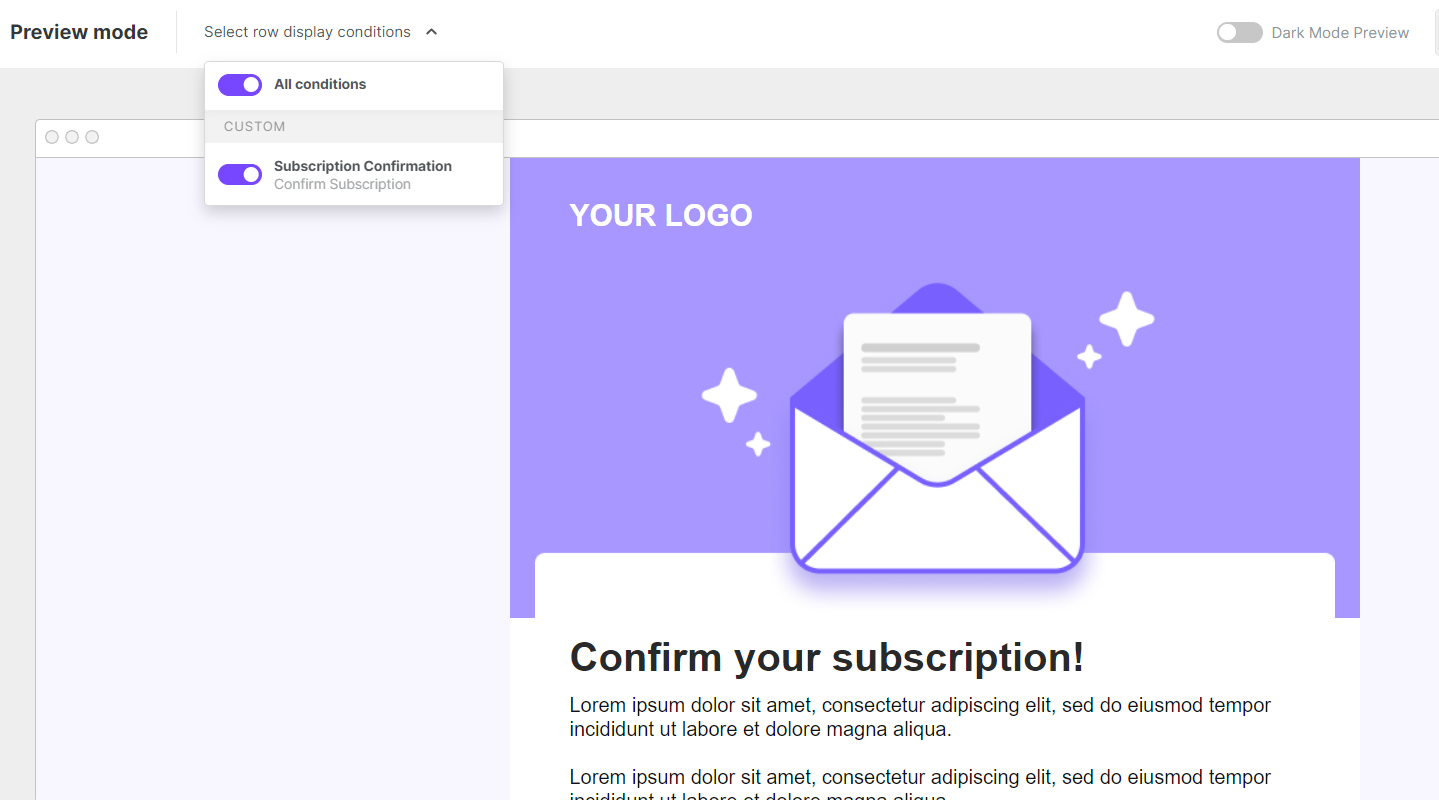
Use the checkboxes to turn each condition on or off. If a design has multiple conditions, you can check them in any combination to preview different scenarios.
RGE Studio cannot validate your display conditions. The preview is only an approximation of what recipients will see. RGE Studio does not have access to your customer data. Test these designs in your sending platform too.
Frequently asked questions about Display Conditions
Can the image and text displayed in the row be dynamic?
Yes. The content in the row is up to you, so you can use merge tags and dynamic images.
What syntax/characters can be used in the conditional statements?
RGE Studio does not require a specific language. The conditional syntax is set by your sending platform. The builder accepts whatever syntax you provide. It inserts your syntax around the row in the generated HTML at save time. The builder does not validate the syntax for you.
Not sure what syntax your ESP supports? Here is documentation from a few popular platforms:
If you have any questions, feel free to contact us.
Comments
0 comments
Please sign in to leave a comment.