Adding Dynamic Content in RGE Studio for Klaviyo

Beefree App is now RGE Studio!
The email design suite you already know and love just leveled up. We’re working hard to update our help center, but you still may see some references to the old product name.
This article applies to both versions of the builder in paid plans.
Overview
RGE Studio's Display Conditions and Merge Tags support custom conditional syntax. You can use your email service provider's template language in RGE Studio designs. This article covers two Klaviyo-specific examples: hiding and showing rows based on a profile property, and creating a product loop. A product loop repeats a row once for each item in a list.
The syntax in this article is specific to Klaviyo. Other email platforms use different syntax for similar results.
Prerequisites
Complete this step before getting started:
- Enable Display Conditions: You need a Professional plan or higher. Go to Settings > General settings > Builder preferences and toggle on Display conditions. Learn more about Display Conditions.
Export to Klaviyo
RGE Studio includes a Klaviyo connector. See the Exporting to Klaviyo article to send your design directly. For HTML export, follow the Copy the HTML steps and paste the code into Klaviyo.
Show/Hide Rows
In RGE Studio, Display Conditions control which rows are visible to which recipients. In Klaviyo, the same feature is called Hide/Show Conditions. To use it, write your condition using Klaviyo's conditional syntax in the Before and After fields of the Display Conditions panel.
Show/hide example
In this example, one row is shown to recipients with a Favorite Color profile property of "green." Another row is shown to recipients with a value of "yellow."
- Add the Favorite Color custom property to the relevant Klaviyo profiles.
- Log in to RGE Studio and open the email design.
- Click the row to show to "green" recipients. The Row Properties panel opens on the right.
- Scroll to Dynamic Content and click Add condition.
- Fill in the Name and Description fields.
- Paste the following into the Before field:
{% if person|lookup:'Favorite Color' == 'green' or 'green' in person|lookup:'Favorite Color' %}- Paste the following into the After field:
{% endif %}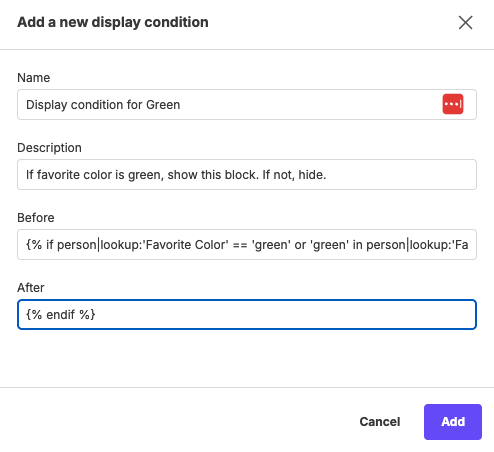
- Repeat these steps on the "yellow" row. Change "green" to "yellow" in the Before syntax.
- Export your design to Klaviyo and send the email.
Product Loops
Use Display Conditions and Merge Tags to loop through a list of items in an email. This is useful for emails like abandoned cart reminders.
Loop prerequisites
Before adding loop syntax in RGE Studio, set up the required data in Klaviyo:
- Add a custom property to each customer profile. Save the item data as a List type in Klaviyo.
- Confirm each list item has the fields your merge tags will reference.
Create merge tags
In your Workspace Settings, create the following merge tags. Use the syntax in this table.
| Merge tag name | Syntax |
|---|---|
| Product Name | {{ item.product_name }} |
| Product Price | {{ item.price|floatformat:2 }} |
| Image source | {{ item.image }} |
| Item quantity | {{ item.quantity }} |
Next, set up a Product URL special link in the same Workspace Settings. Creating a special link follows the same process as creating a merge tag. In the special links settings, name it Product URL. Use {{ item.product_url }} as the syntax.
Open your email design once all tags and links are saved.
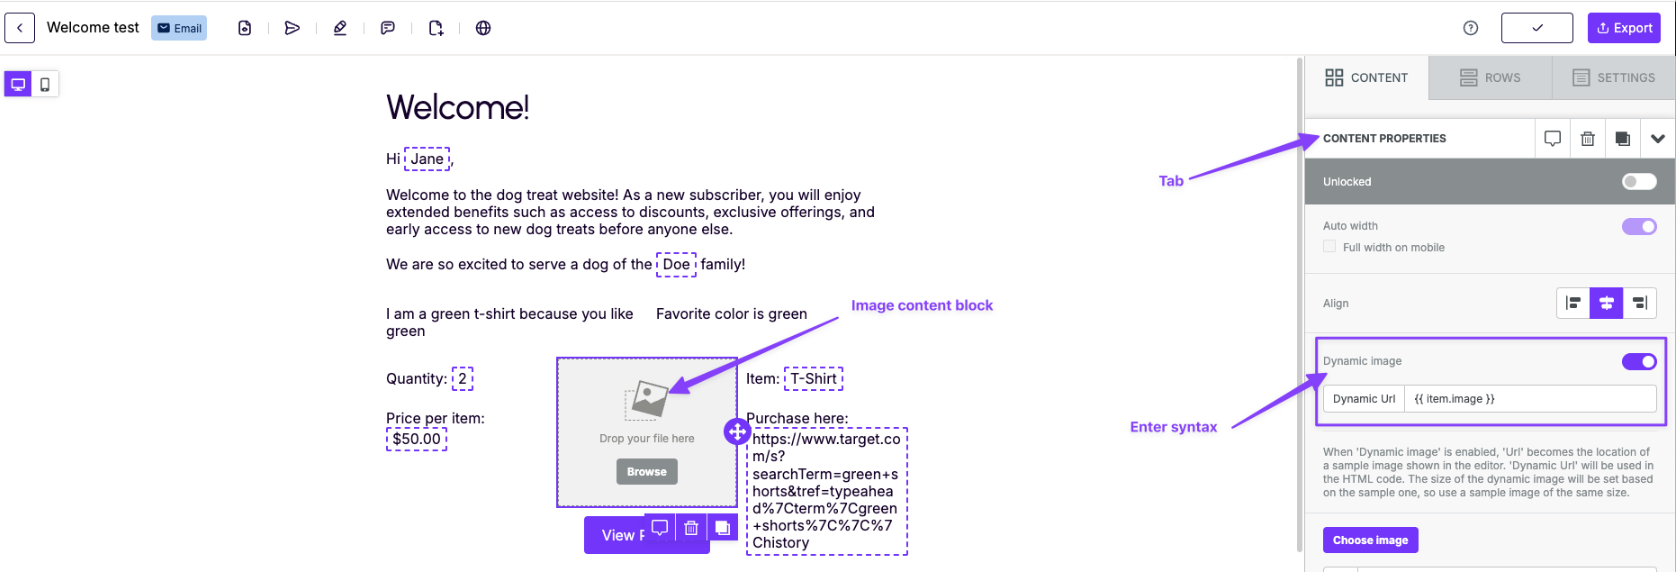
Add dynamic images
- Drag an Image content block into the row.
- Click the Image block and go to Content Properties.
- Toggle on Dynamic image.
- Paste
{{ item.image }}in the Dynamic url field.
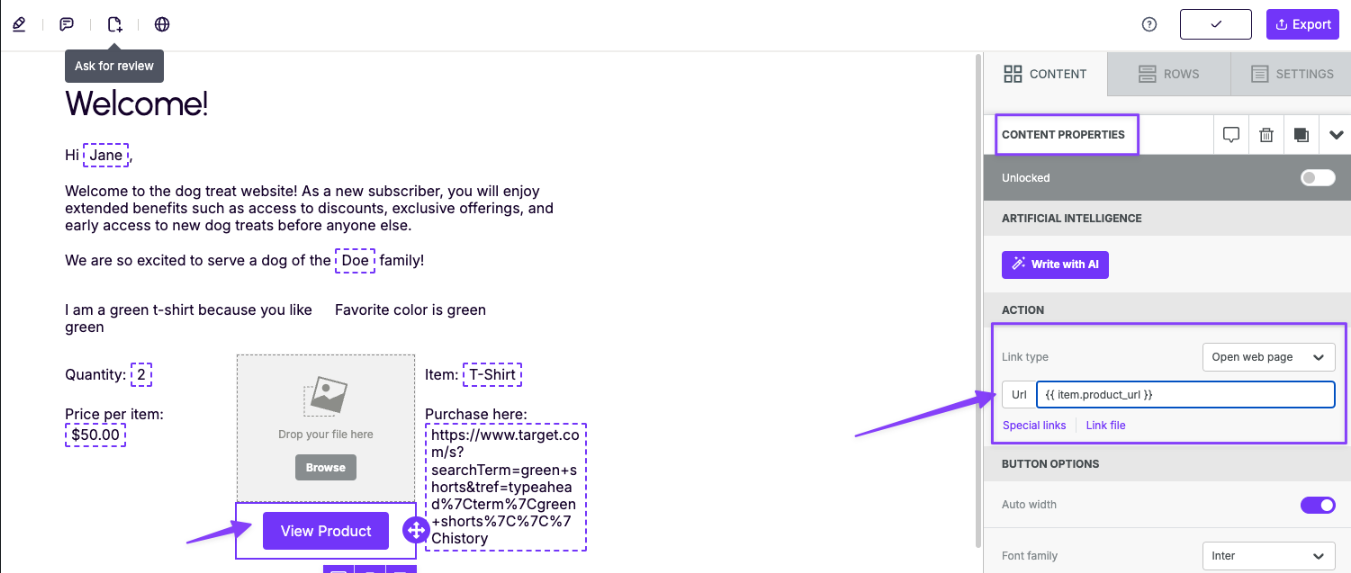
Add dynamic button URLs
- Drag a Button content block onto the stage.
- Go to Content Properties.
- Set Link type to Open Web Page.
- Click Special links.
- Select Product URL from your special links.
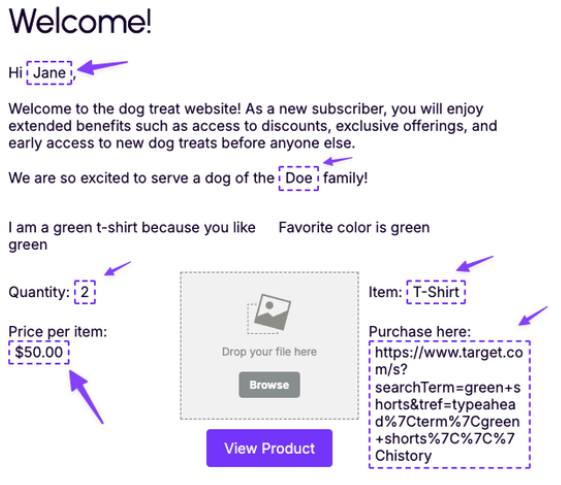
Add merge tags
- Drag a paragraph content block onto the stage.
- Add your text and a merge tag. For example: "Quantity: Item quantity." Here, Item quantity is the name of the merge tag from Create merge tags.
- Add the remaining merge tags to the row.
Wrap row with Display Conditions
- Go to Row Properties and scroll to Display Conditions.
- Click Add a condition.
- Fill in the Name and Description fields.
- Paste the following into the Before field:
{% for item in person|lookup:'abandoned_cart' %}- Paste the following into the After field:
{% endfor %}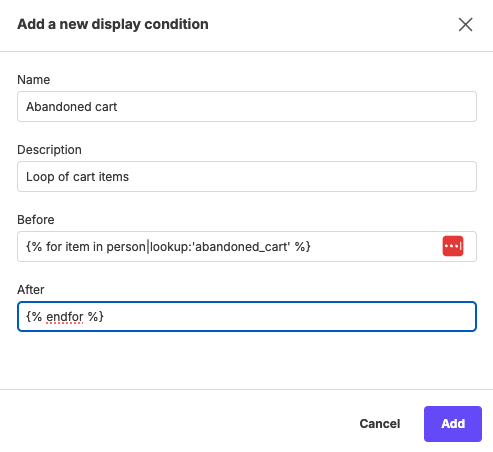
- Export your design to add it to a Klaviyo flow or campaign.
If you have any questions, feel free to contact us.
Comments
0 comments
Please sign in to leave a comment.