Multi-user support and management in RGE Studio

Beefree App is now RGE Studio!
The email design suite you already know and love just leveled up. We’re working hard to update our help center, but you still may see some references to the old product name.
This article applies to all plans. However, some features may be limited or unavailable on the Starter plan.
Overview
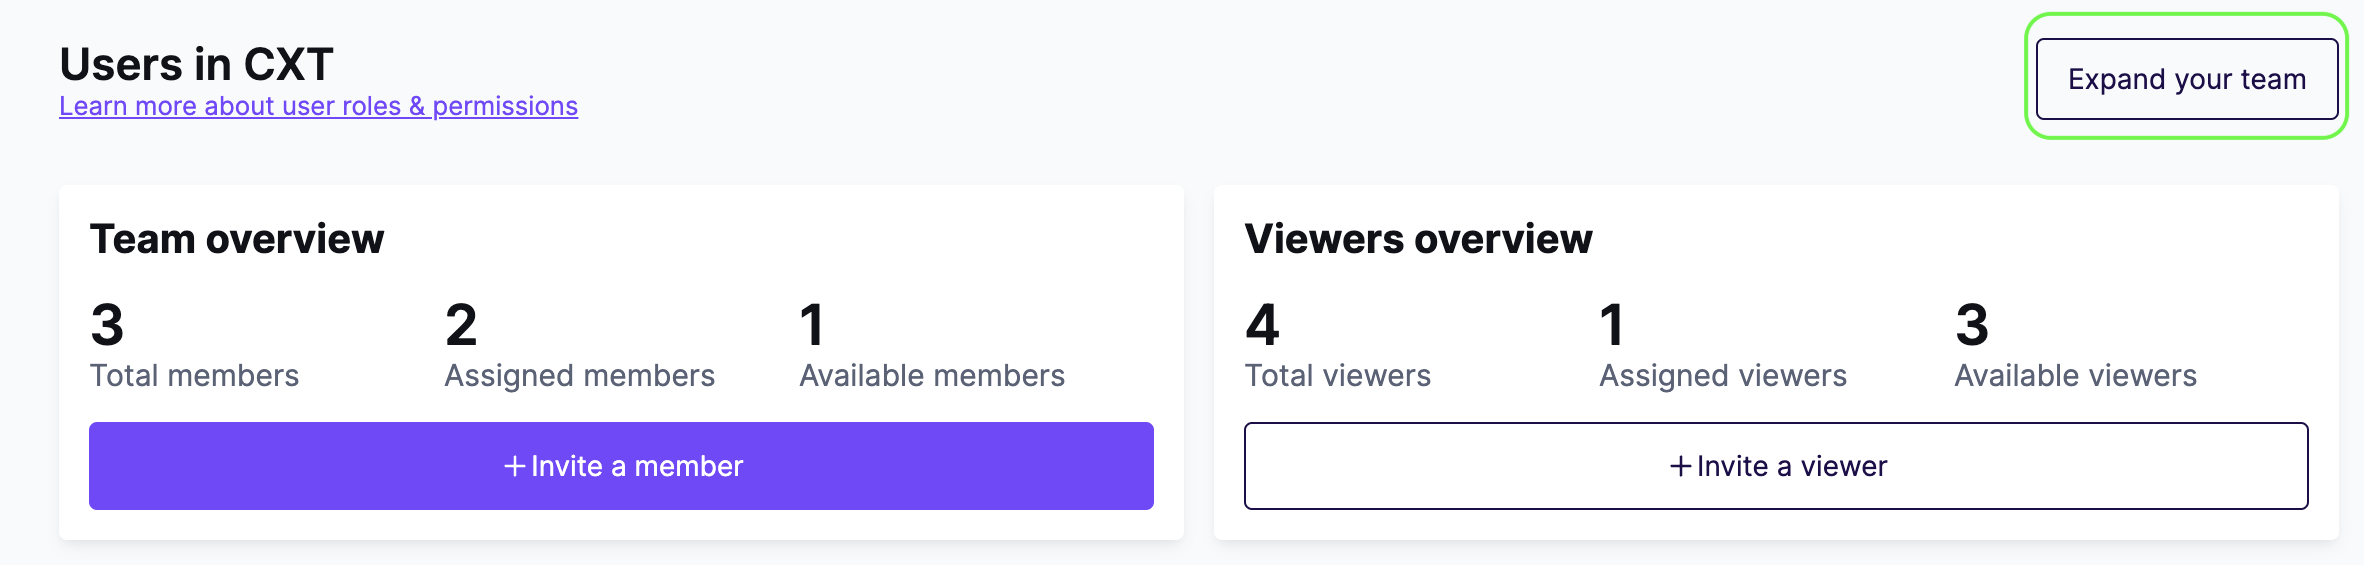
Working with a team? You can invite your collaborators to work with you in RGE Studio. Additional users are available on all plans, but user management options vary.
This article explains how to invite and manage additional users. It also covers how to purchase or remove additional users from paid accounts.
Before You Start
You need to be an owner or an admin to access the Manage Users page. Click your name in the top right to expand the navigation menu.
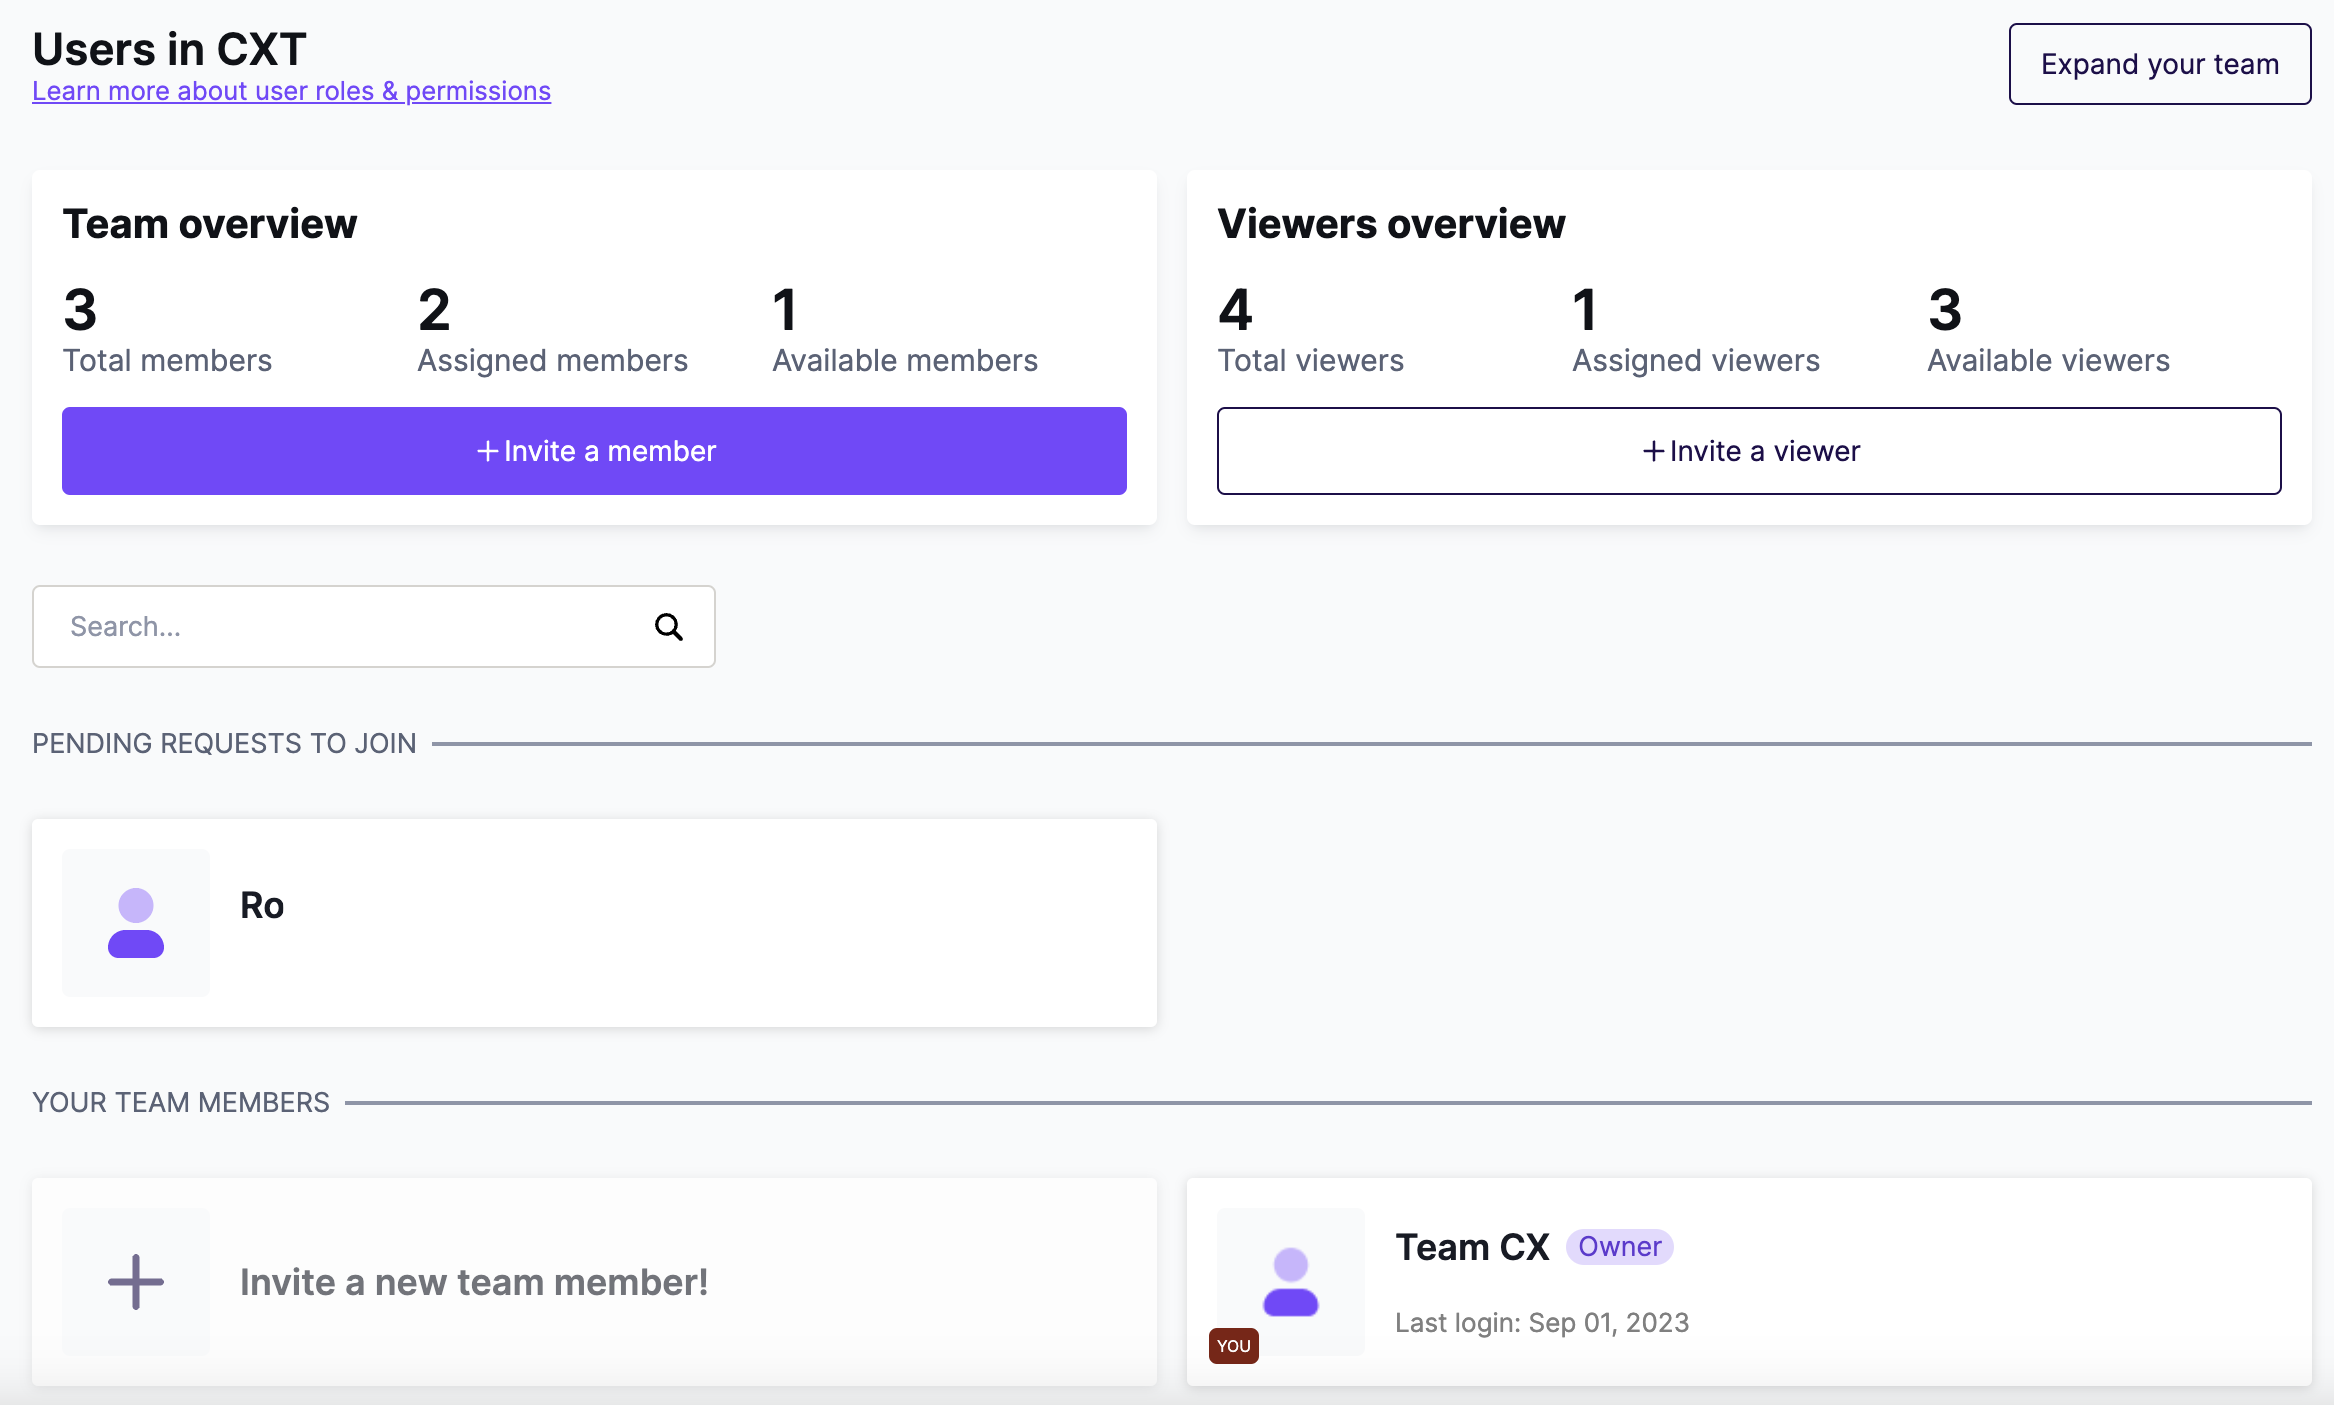
The Manage Users page may look different based on your plan.
Starter
You can invite as many users as you want to a Starter account. All users on this plan have admin permissions. Admins can access everything in RGE Studio except the subscription page.
Professional, Business, and Enterprise
Paid plans offer two types of users, differentiated by seat type:
- Members: These are the people typically working inside the platform on a regular basis. You can apply user roles to these types of users. This article covers this type of user.
- Viewers: These are people who need access to the account, but do not need editing permissions. For more information, see Working with Viewers.
You can purchase more member seats at any time. The number of viewer seats included depends on your plan. Viewer seats cannot be purchased separately. The Manage Users page shows your available seat types under Total seats.
See the table below for more information on what is included in each plan:
| Starter | Professional | Business | Enterprise | |
| # of included users (member seats) | 1 | 2 | 2 | Custom |
| Cost of additional users | Free | $15/month $150/year |
$35/month $350/year |
Talk to your account manager |
| # of included viewers | None | 4 | 10 | Custom |
The person who creates an RGE Studio account starts as the Owner. You can transfer ownership by updating the Owner's email address. Paid plans include at least one additional seat. You can invite a user to this seat at any time. This seat cannot be removed.
Enterprise customers should contact their Account Manager to purchase additional users. The process may vary depending on your contract. Enterprise plans also support a custom number of viewer seats.
Managing Invitations
This section covers how to invite users and modify existing invitations.
Inviting a User
- Navigate to the Manage Users page.
-
Click the Invite People button.

- Select Member.
-
Enter the name and email address of the person you'd like to invite.
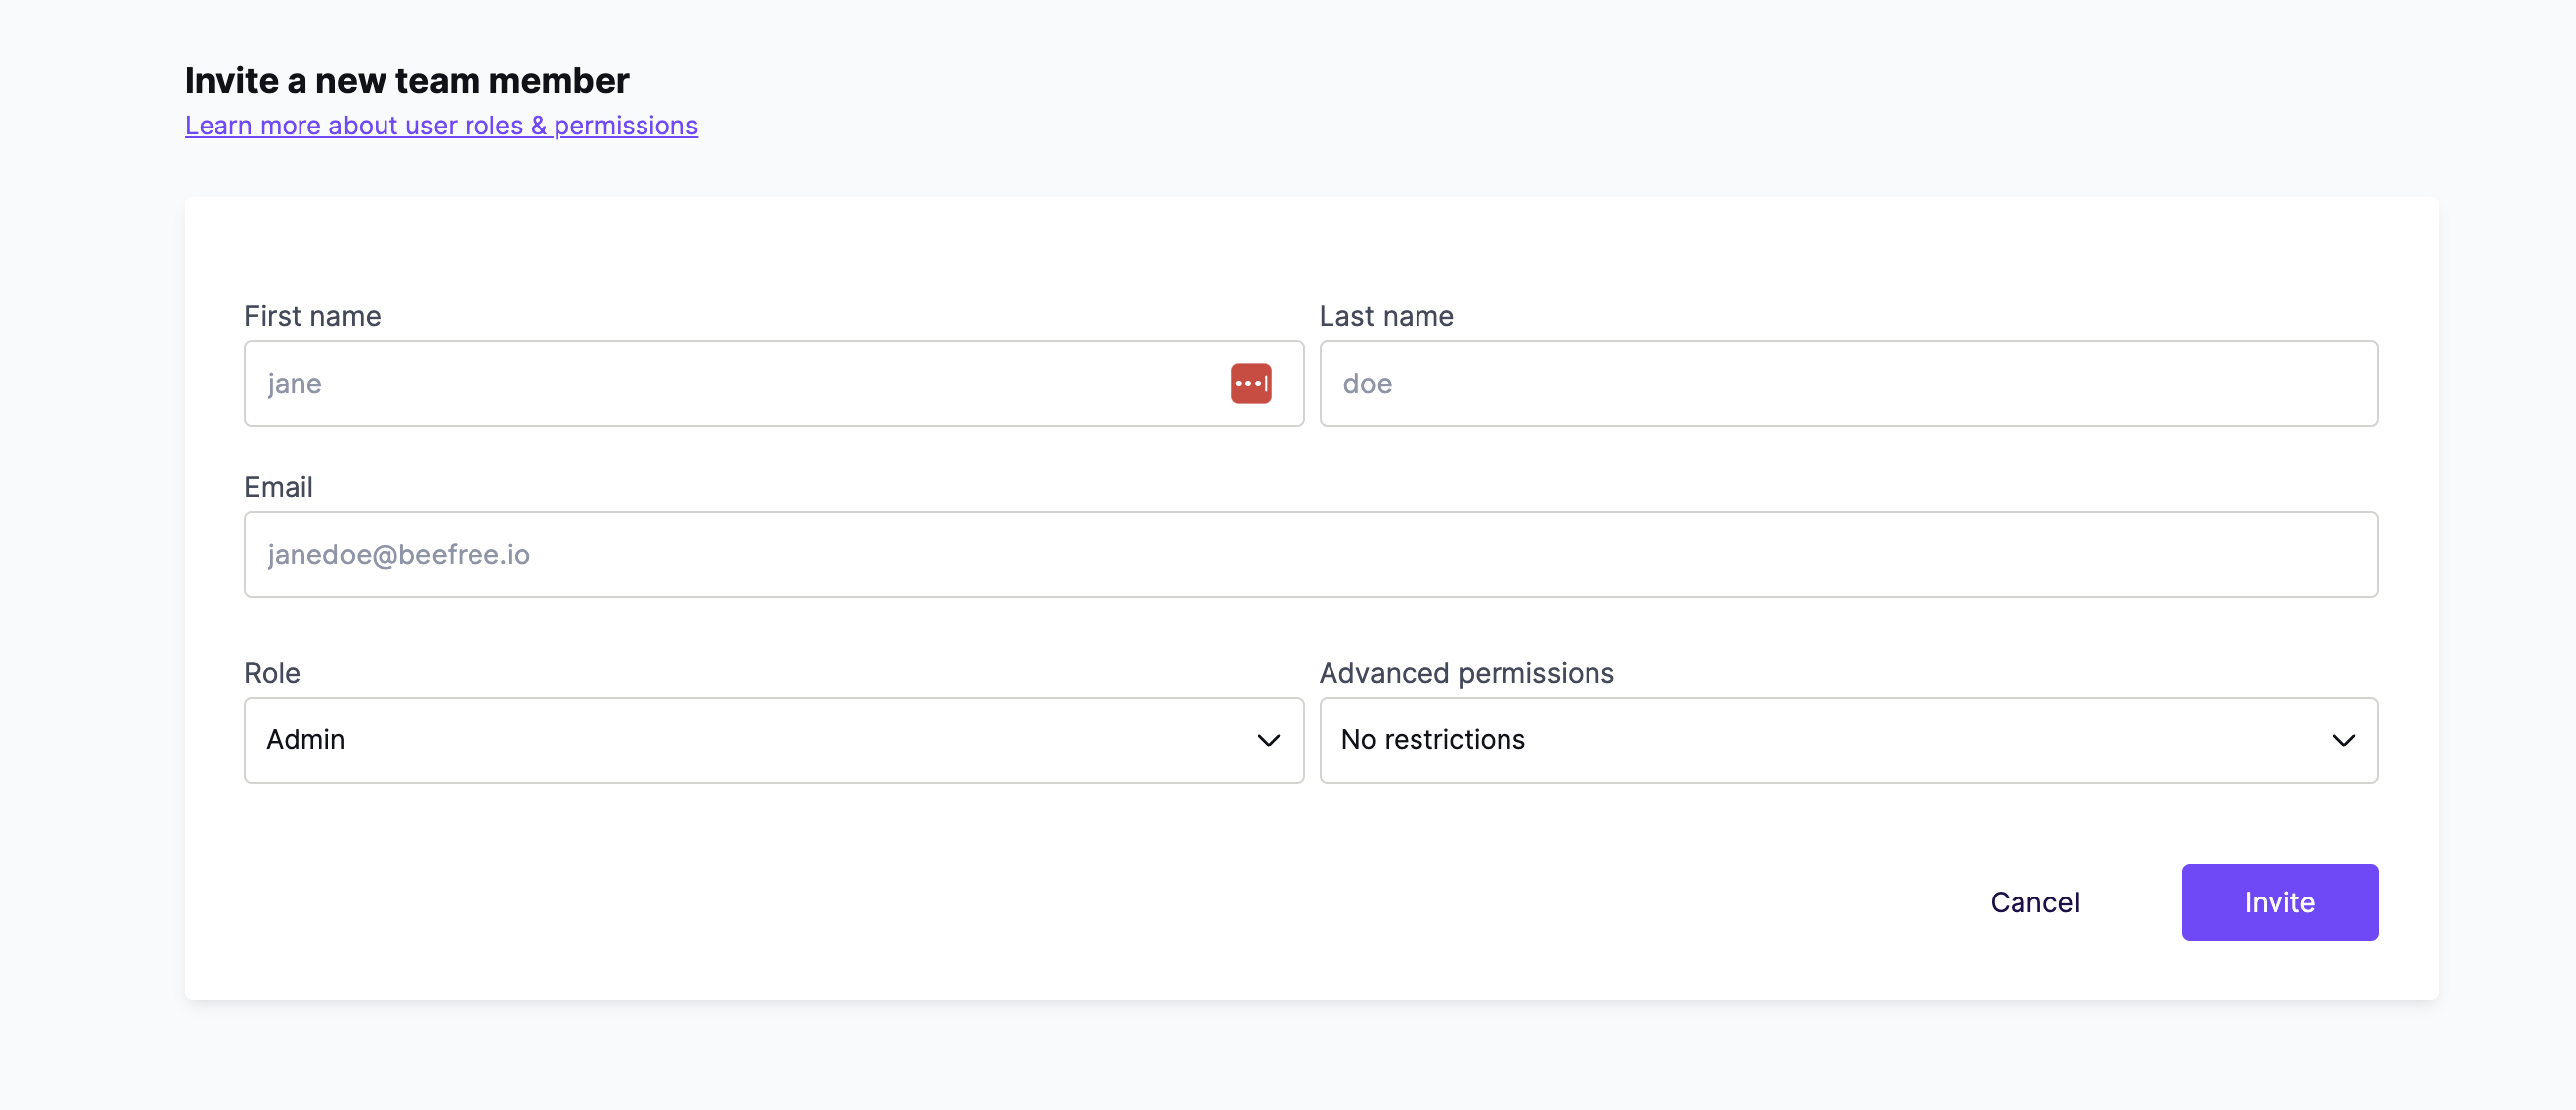
If you're on a paid plan, you can also select a user role. Business and Enterprise users will also see options for Advanced permissions and Workspaces. - Click Invite.
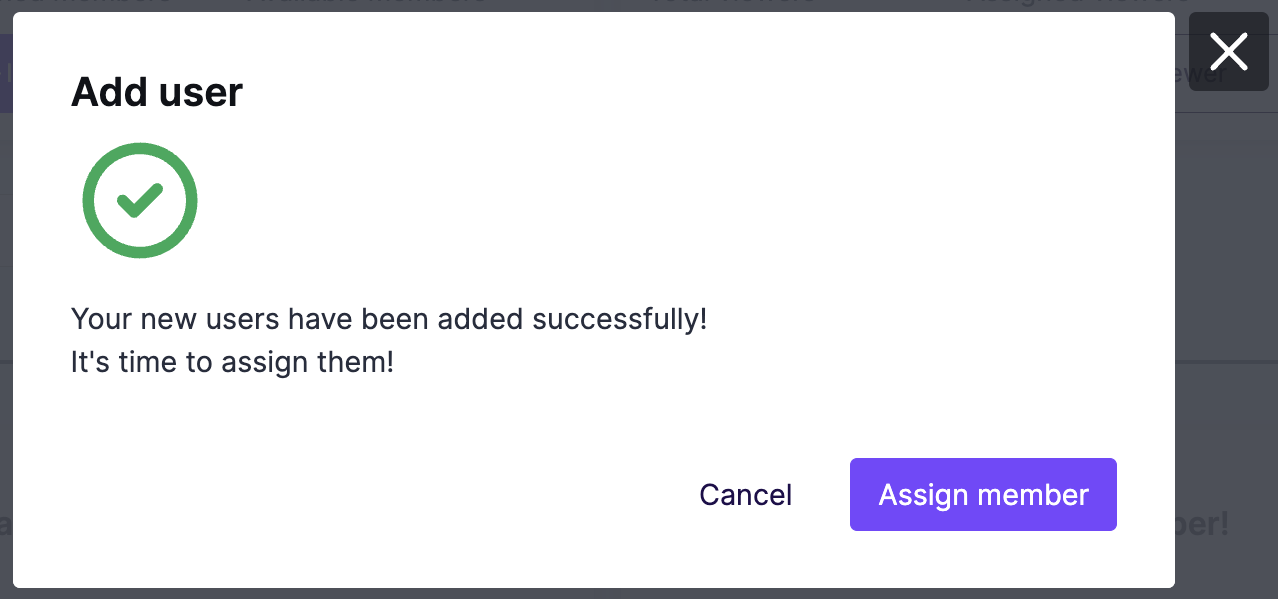
RGE Studio sends the new user an email invitation. They click the link and follow the prompts to create their login credentials. You'll receive a confirmation email once they complete signup. Invitation links are valid for 15 days.
To invite a viewer, follow the same steps, but select Viewer at step 3. For full details, see Working with Viewers.
Pending Invitations
You can see pending invitations on the Manage Users page at any time. These users are marked with a label next to their name. Hover over a user to see two icons for managing the invitation:
-
Re-send invitation, which sends a new email invitation to the user.
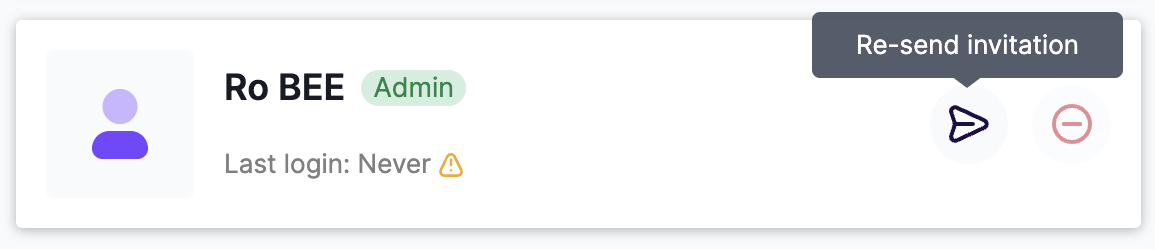
-
Cancel invitation, which prevents the user from accepting the invitation.

When you cancel an invitation, you'll need to confirm before the change takes effect.
Managing Users
This section covers purchasing, editing, and removing users.
Purchasing Users
Note: Only Owners can perform these actions.
You'll need an available member seat before you can invite a new user. Follow the steps below to purchase one.
- Navigate to the Manage Users page.
- Click the Invite People button.
- Select Member.
-
A purchase modal will appear. Use the - and + icons to modify the number of users. The price updates as you adjust the quantity.
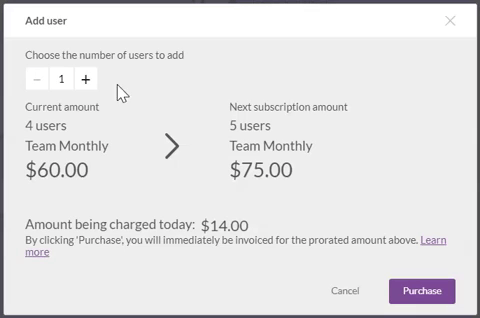
- Once you've selected your desired number of seats, click Confirm and pay.
You can also access the purchase modal by clicking the Manage button.
The purchase modal shows two prices:
- The amount you pay today. This is prorated based on the remaining days in your billing period.
- The new base cost of your subscription. This reflects the updated number of seats.
If the transaction is successful, you'll get a confirmation message. To immediately invite a new user to this seat, click Assign seat.
Editing Users
You can find the complete list of users in the lower part of this page. You can also search for users by name or email.
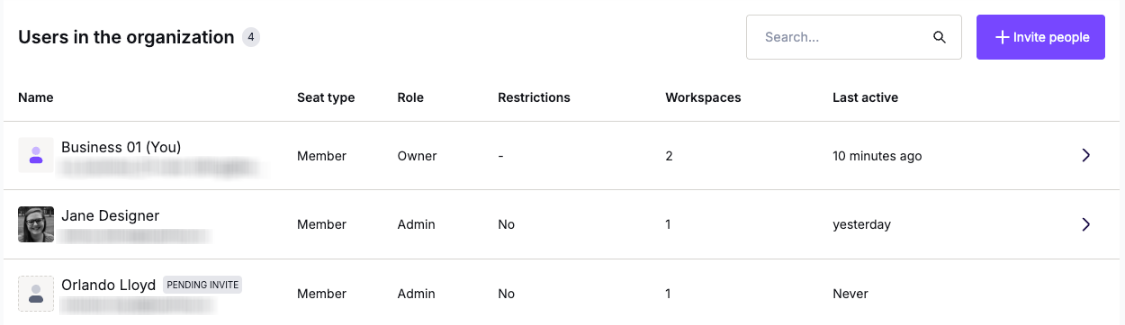
For each user in your account, you can see:
- Seat type (Member or Viewer)
- Role
- Restrictions (Advanced permissions)*
- Workspaces*
- Last active timestamp
*These features are only available on Business and Enterprise plans.
To edit a user's role or permissions, click the > icon to the right of their details. From here, you can update user roles, set advanced permissions, or modify workspace access.
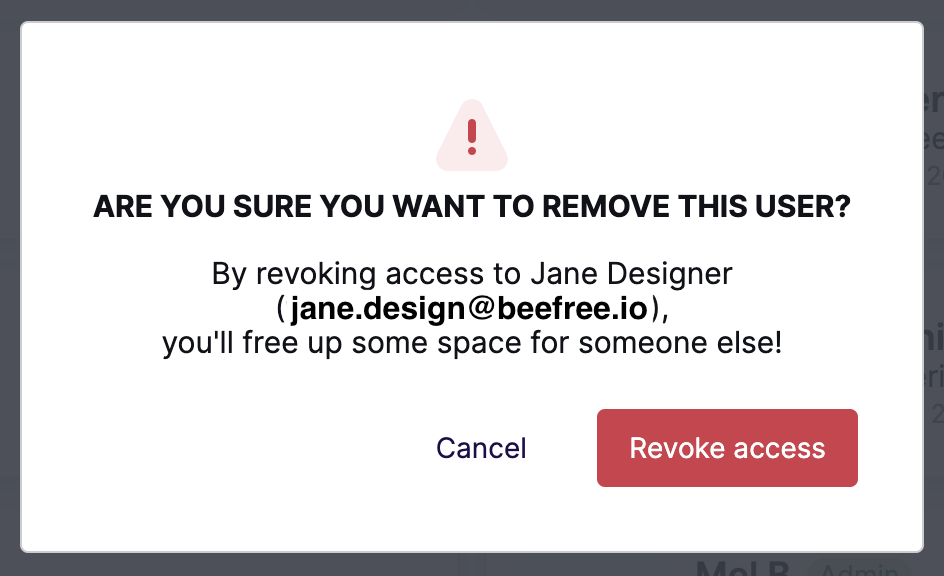
Removing Users
To remove a user, hover over their name on the Manage Users page. On the right-hand side, click the trashcan icon.
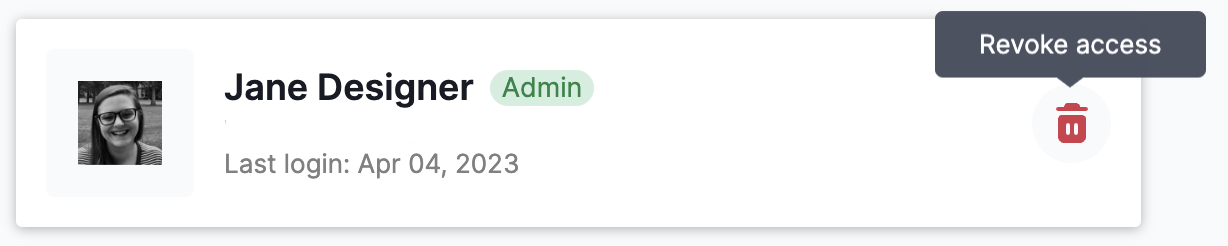
A modal will open asking how you would like to proceed:
- Remove the user only. This revokes the user's access. The seat stays available in your account. Use this option if you plan to invite a new user. You'll continue to be billed even if the seat is empty.
- Remove user and seat. This revokes the user's access and removes the seat from your account. Use this option to reduce your subscription fees.
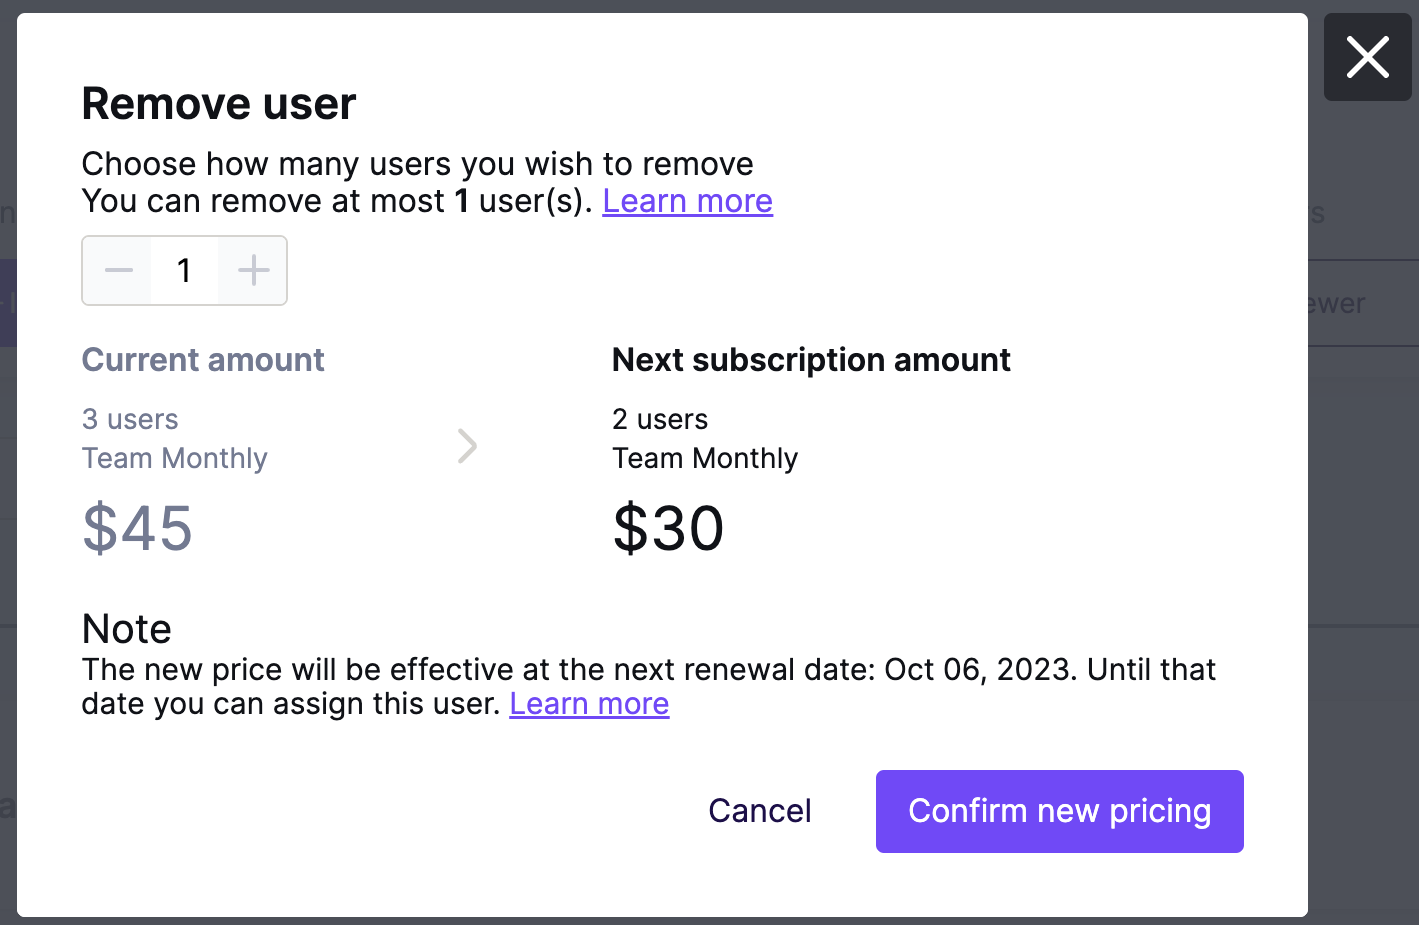
If you have empty seats, click the Manage button and go to the Remove seats tab. This tab only appears when empty seats are available.
Seat Requests
Discovery settings let people on the same domain find and request to join your account. To prevent this, set your Discovery settings to Only when invited. This option is not available for accounts registered with a public email domain (e.g., gmail.com or outlook.com).
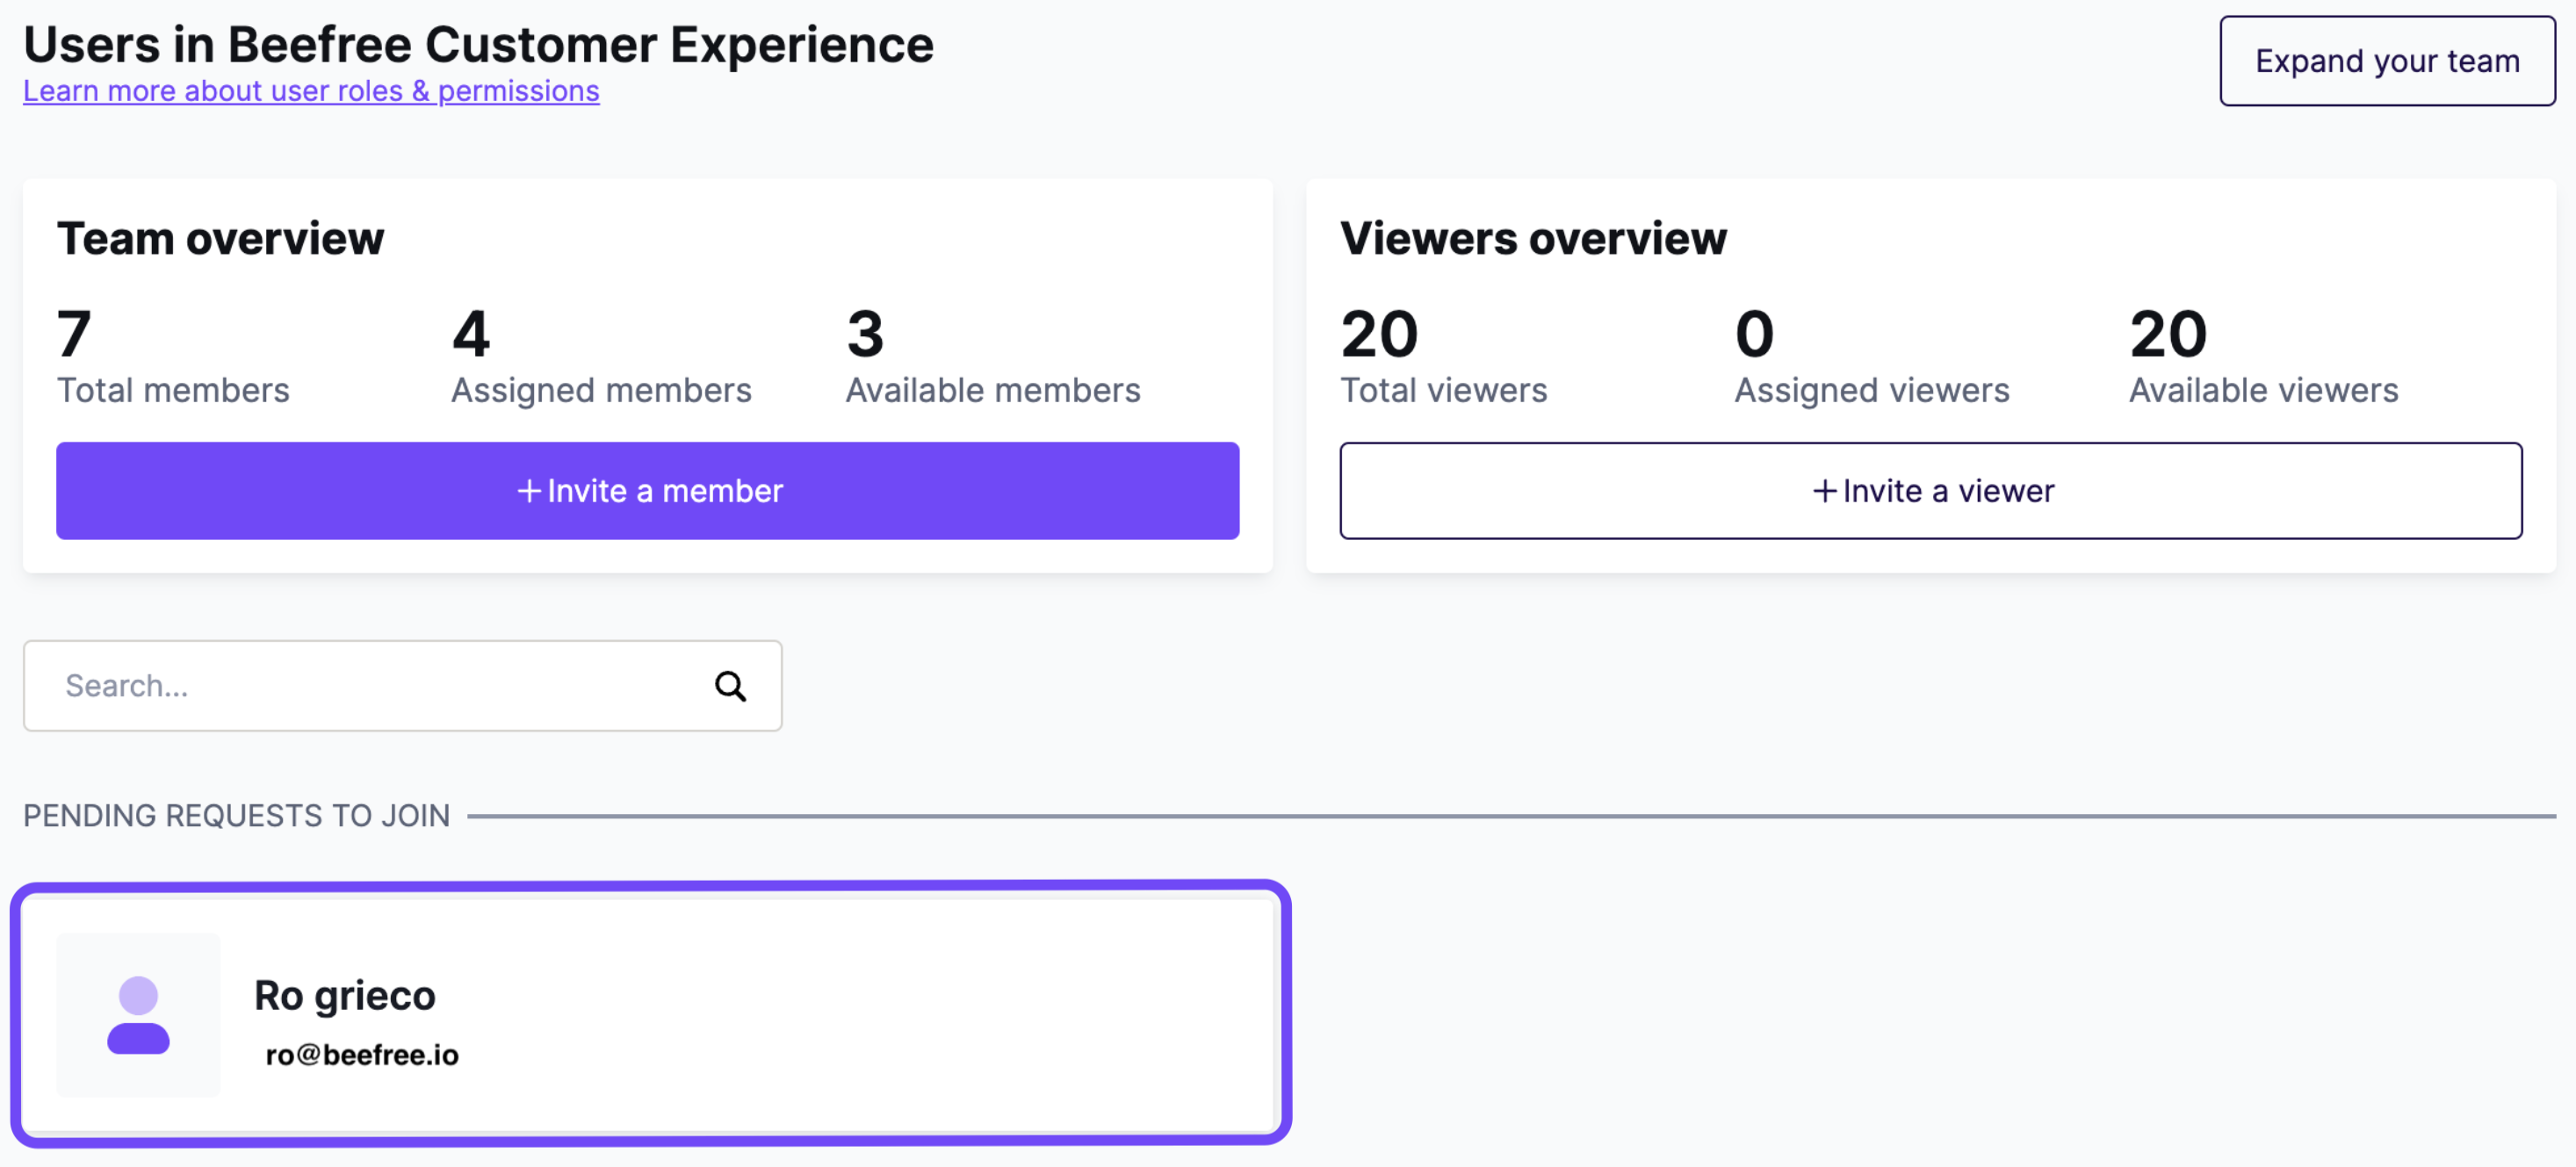
If Discovery Settings are set to Teammates can request, you'll see join requests on this page. For full details, see Join your Organization in RGE Studio.
Additional Notes
- When you remove a user, they lose access immediately.
- For annual plans, empty seats can only be removed in the final 30 days of the billing period. You'll receive a reminder email 30 days before renewal.
- New users are charged a prorated amount based on your current billing period.
- Removing a member seat mid-period does not credit your account for the remaining time. To avoid being charged for a seat in the next billing period, remove it before your current billing period ends.
If you have any questions, feel free to contact us.
Comments
4 comments
Does revoking a user account remove them from BEE or can the account be reinstated? Also, when a user is revoked does this impact any of the work that they did in assigned workspaces?
Hi Kyle!
Great question, and thanks for being a part of the BEE community!
To answer your question, If you revoke a user to collaborate on designs in your account, they just won't have access to that specific workspace any longer. Any progress they have worked on within it will remain, and will not be erased or reverted.
I hope this solves your question and helps clarify things further!
I set up the organization for my company, but now my boss would like to log in and set up a paid plan. I'd like to transfer ownership to him. Is that possible?
Hello Dan.
You can indeed transfer ownership to another.
To do so, simply change your email address with your boss's as explained Here
Please sign in to leave a comment.