Navigating RGE Studio (formerly known as Beefree)

Beefree App is now RGE Studio!
The email design suite you already know and love just leveled up. We’re working hard to update our help center, but you still may see some references to the old product name.
RGE Studio is a tool to help you create beautiful emails and landing pages. Our intuitive builder allows people of all expertise levels to create responsive designs. RGE Studio (formerly known as Beefree) offers a managed solution for centralizing your content creation workflow. The platform is built around the RGE Studio builder.
This quick start guide is a great place to start if you've recently signed up for RGE Studio. We have a couple of different guides available:
- Navigating RGE Studio (you’re here!)
- Workspace settings
- Managing Designs
- Building Content in RGE Studio
- Professional, Business & Enterprise
- Glossary
This is the quick start guide for Navigating the RGE Studio platform. This guide applies to all RGE Studio plans, but some features may look different between plans.
This quick start guide covers all features available in the RGE Studio platform. Depending on your user role, you may not have access to all features.
Logging in
When you sign up for RGE Studio, there are four ways to create your account credentials:
- Traditional form (manual email/password)
- Microsoft SSO
- Google SSO
- Okta SSO (Enterprise plan only)
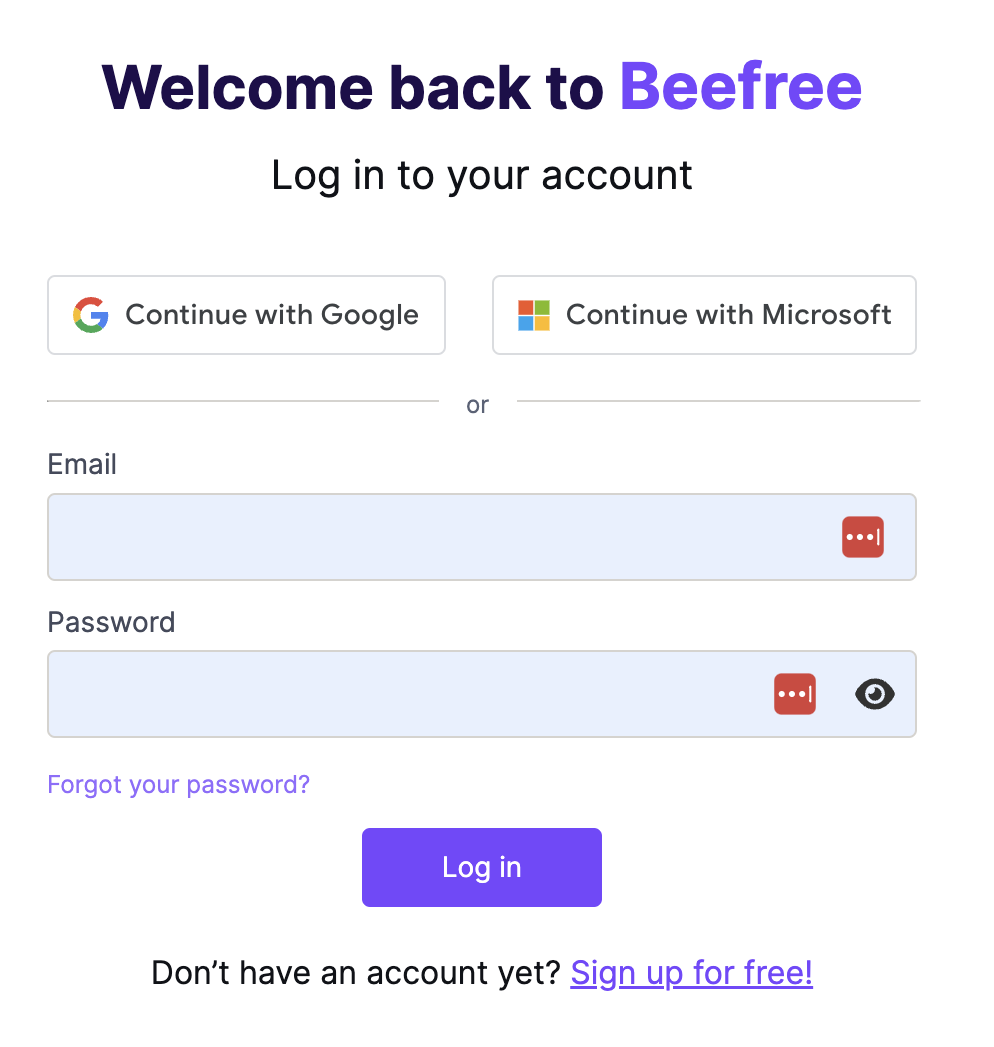
Once your account is created and activated, you can sign in from https://reallygoodemails.com/app/login. You can also request a password reset email from this page if necessary.
Once logged in, you can review or change this information anytime from the Profile page. For full details, please read How do I update my RGE Studio account credentials?
Switch Organizations
This option only appears if your email is listed as a user on more than one RGE Studio account. This page shows a list of all accounts you have access to.
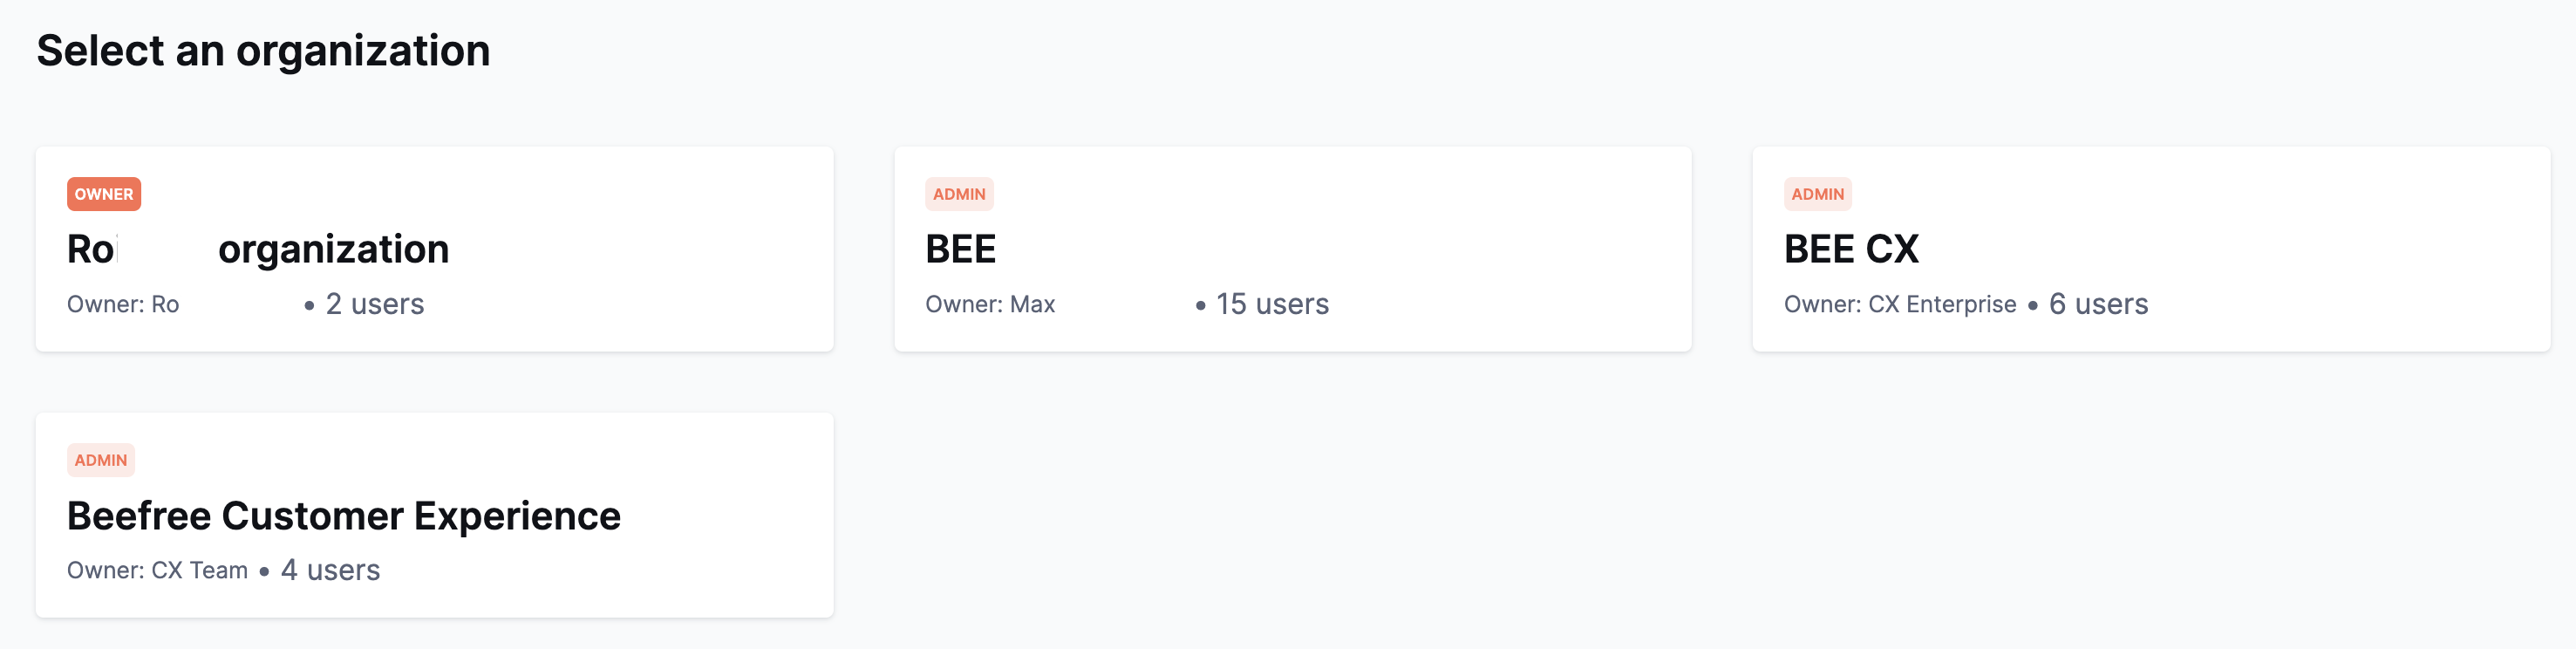
The account you own will always populate at the top of this list. Accounts owned by other people will populate after. For each organization, you’ll see the account name and owner to help you identify the account.
Platform Overview
When you're working in RGE Studio, there is a navigation bar at the top of the page. From here on, we’ll refer to it as the navbar for short. This navbar is always available, except when working inside the builder.
Many options described within this quick start guide are accessible through this navbar. Let's take a look at what you can find here.

- On the left corner of the navbar is the RGE Studio logo. You can click this at any time to return to your homepage. The homepage is your Projects tab. More on this below.
- Immediately to the right, you'll see a box that lets you know which workspace you're located in. If you're using a Starter or Professional account, you only have one workspace.*
- Next is the Projects tab. As mentioned previously, this is your homepage. Here you can access any designs you've created and your project folders.**
This is the Activity Dashboard. Here you can see recently edited designs, recent comments, and ongoing reviews.
- Then we have the Library tab. This is where you create and store custom templates. You can also manage your saved rows and your media content in this area.**
- The last option on the left-hand side is the Settings tab. This is where you can manage a variety of account settings. We’ll take a closer look at this page later.**
- On the right side of the navbar, we have some more options. The bell icon serves as your notification center.
-
Farthest to the right, you'll see your own name. In the screenshot, this is where you see "CX Team." Clicking on this opens a dropdown menu. From here, you can access the following pages:
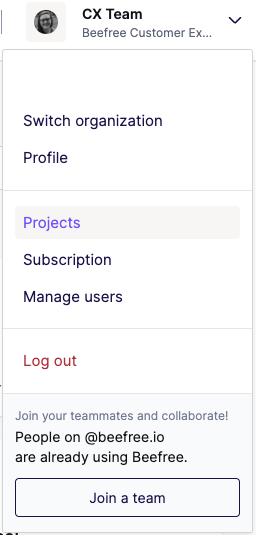
- Profile Manage your login email and password.
- Appearance Change the location of the navbar from the top to the left side.
- Switch organization*** Switch to another RGE Studio account if applicable.
- Projects This is another way to return to your Projects tab.
- Subscription Review and manage your subscription and billing details. You can also download your subscription statements here.
- Manage Users Purchase, invite, or remove additional users.
- Product Updates you can see what's new in RGE Studio
- Log out Sign out of RGE Studio.
*This option does not appear on Starter accounts. For more information, please see our Professional, Business & Enterprise guide.
**If using a Business or Enterprise account, please see our Professional, Business & Enterprise guide. These features operate differently in these plans.
***This option only populates if you’re a listed user on more than one RGE Studio account.
Resource Center
When you’re working in the RGE Studio platform, there’s always a question mark icon in the lower right-hand corner. This is our chatbot Lumi: it will reply to your questions about the platform and you can also reach out to the Support Team by asking him to open a ticket.

Subscription
This section allows you to review or modify your subscription as necessary. There are three tabs available on this page.
For full details, please read Understanding your Subscription Details.
Overview
This page provides general subscription information. For example, here you can find your plan type, number of users, and upcoming fees. You can also use this page to:
- Change to a different RGE Studio plan
- Cancel your subscription
- Update billing information

If you’re using a Starter plan, Overview is the only tab available in the Subscription section. RGE Studio subscribers on the Starter plan will also see their CDN usage tracked here.
Recurring & usage-based fees
Here, you can find an itemized breakdown of your recurring charges. You can also track your CDN usage on this tab.
If you’re hosting images with us, we encourage you to read Hosted image delivery in RGE Studio for full details.
Statements
Looking for a specific statement associated with your subscription? You can find and download all your statements here.
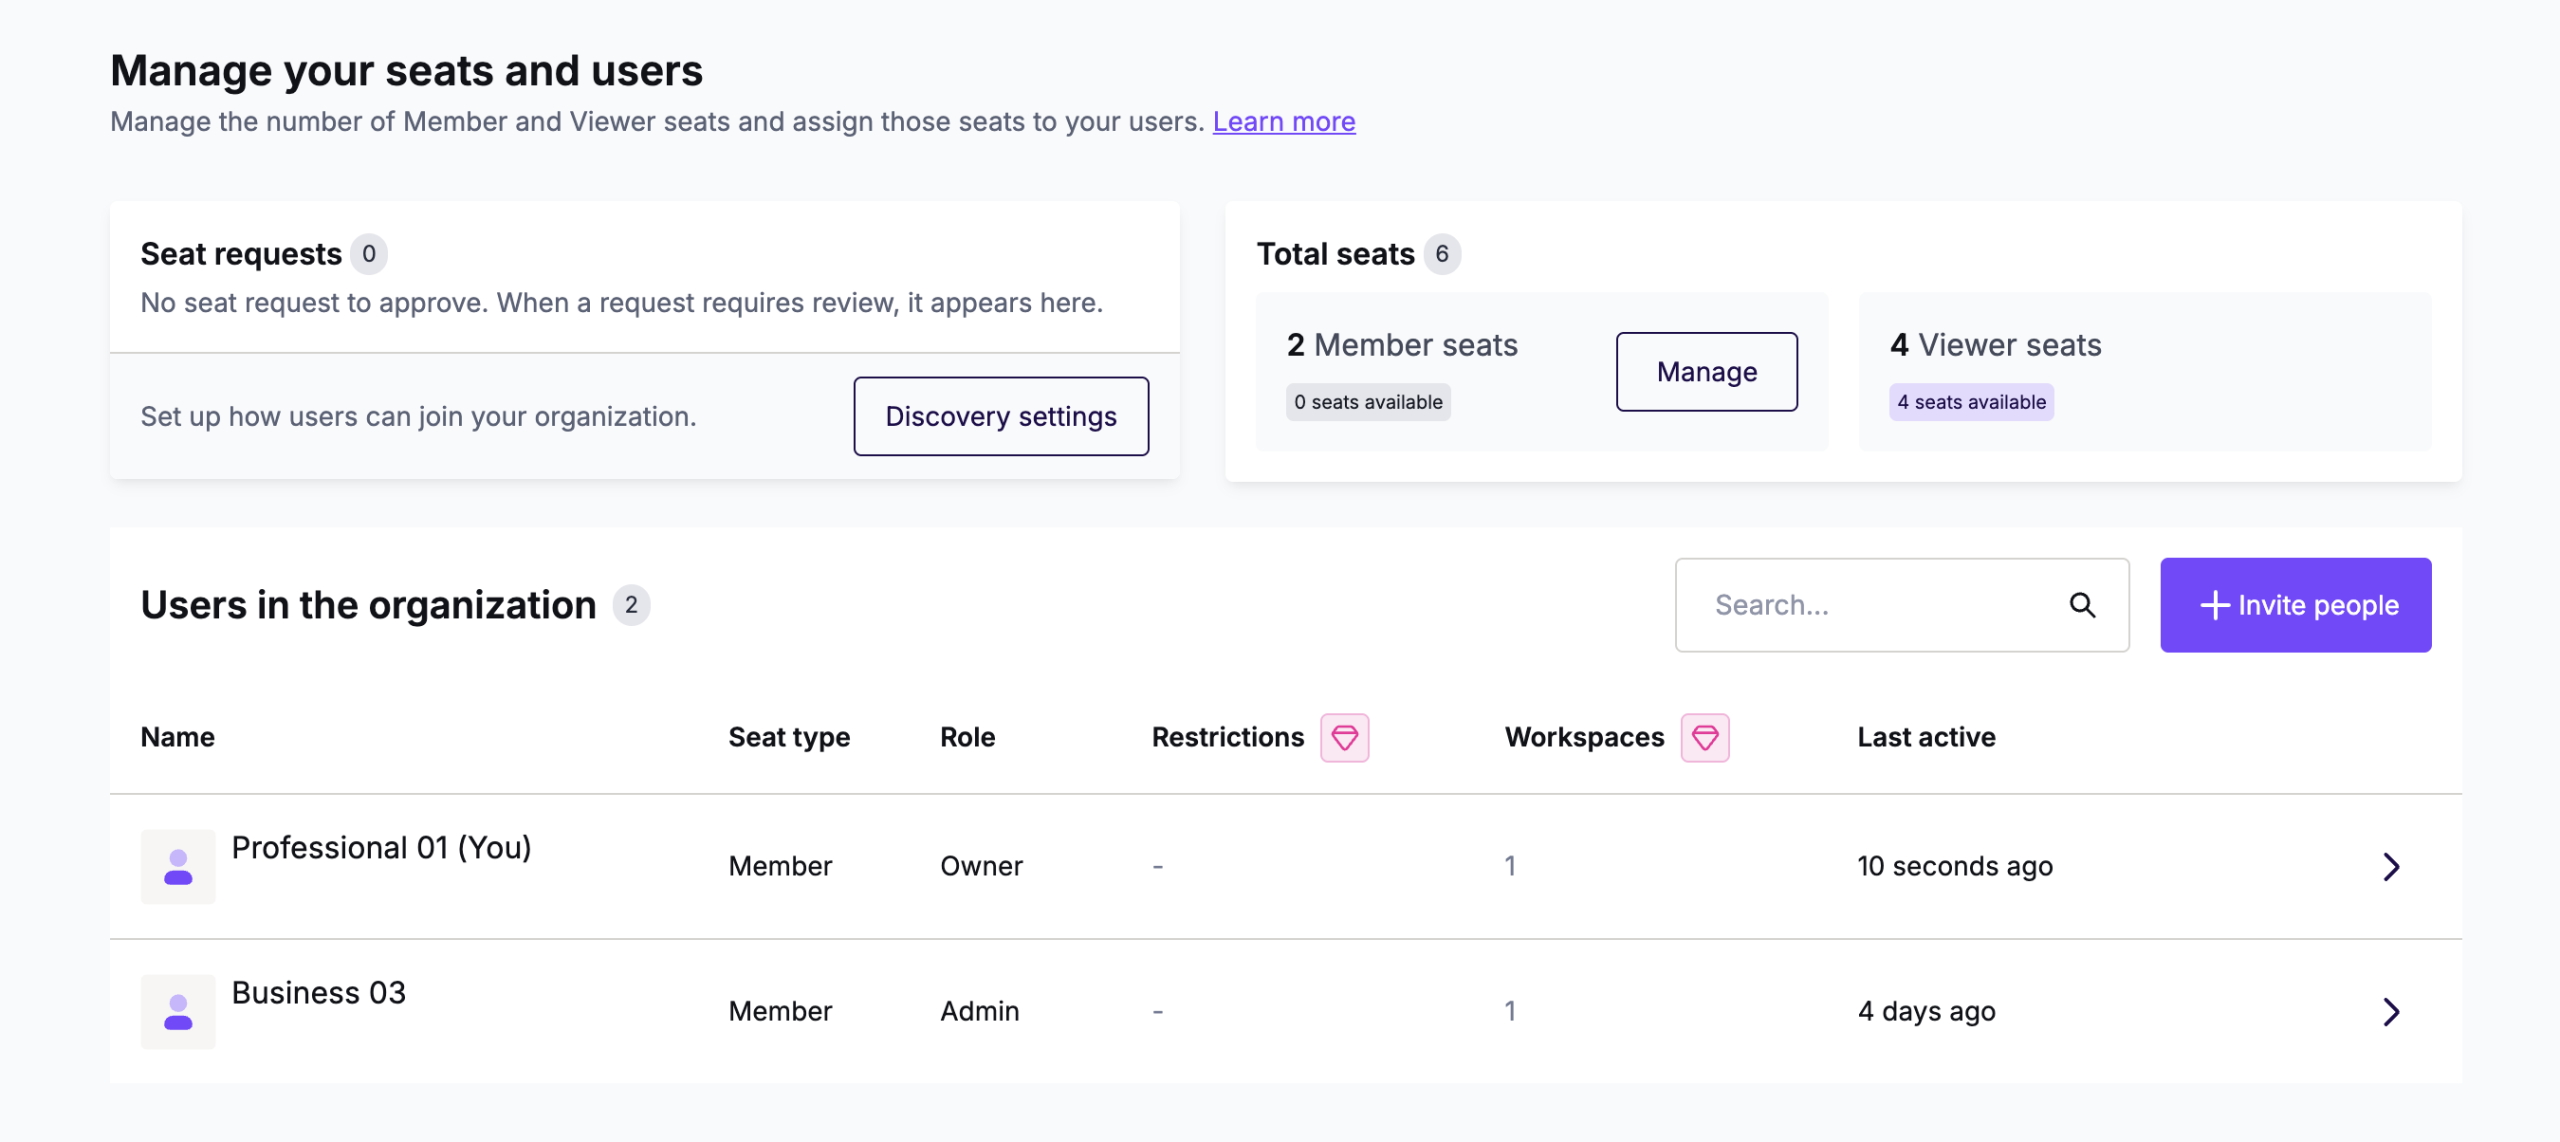
Manage users
This is the area where you can invite, purchase, and modify/remove your additional users. This page can look a bit different depending on your plan. It’s only accessible to account Owners and Admins.
Starter Plans
Use the Invite people button to invite someone new to your account. This page will also include a list of all members who have access to your account.
Professional, Business, and Enterprise Plans
Use the Manage button if you need to purchase new members. This button may not work if you have an Enterprise plan. Enterprise subscribers can purchase additional users through their account manager.
You can use the Invite people to invite new users. You can apply user roles to your members. Viewers have limited permissions. You can easily locate them by the 'eye' icon on the left of each user.
For full details on additional users, please refer to the following articles:
- Multi-user support and management in RGE Studio
- User roles & permissions
- Working with viewers in RGE Studio
Projects
The projects area is where you store all your emails, pages, and project folders. If you’re working in RGE Studio as a designer, this is likely where you’ll spend most of your time.
At the top of this page, you have a few filtering and sorting options. There is also a global search bar to help you locate what you need. You can also use the + Create New button to create a new email, landing page, or folder.
Project folders are only available in paid RGE Studio accounts. If you’re using a paid subscription, your projects will populate at the top of the Projects page. You can store your emails and pages within these folders. Using folders is optional. Click on the preview thumbnail to enter the folder.
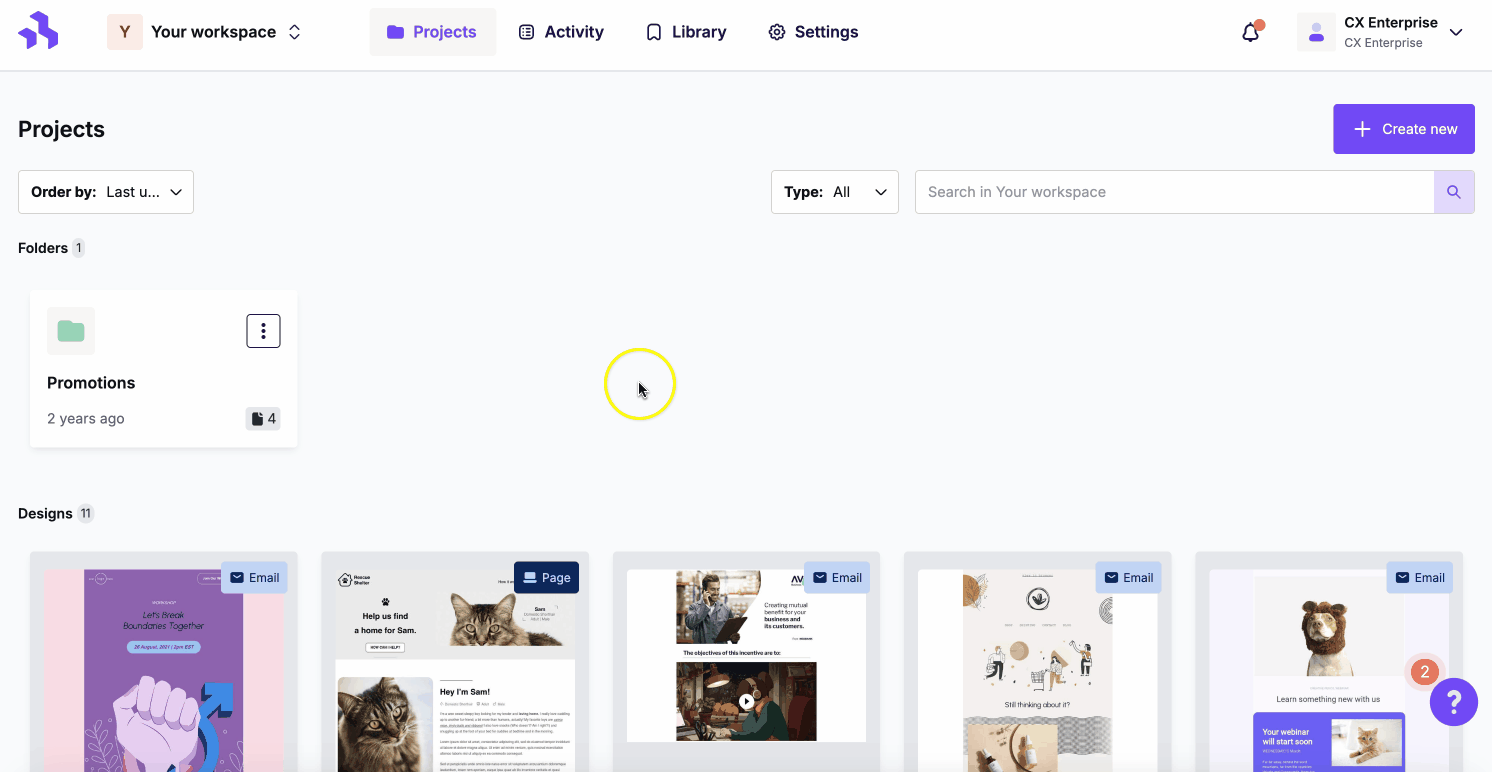
Below your folders, you’ll find all emails and pages that aren’t stored within folders. These are located in a section titled Designs. If you’re using a Starter account, you’ll only see the Designs section. Click on the design preview to enter the builder and start designing.
For full information, please refer to the following articles:
Library

The Library is where you can find your templates, saved rows, and your media content. This page is split into three separate tabs. Think of this area as a starting point for all of your designs. Your library is specific to the workspace you select.
Templates
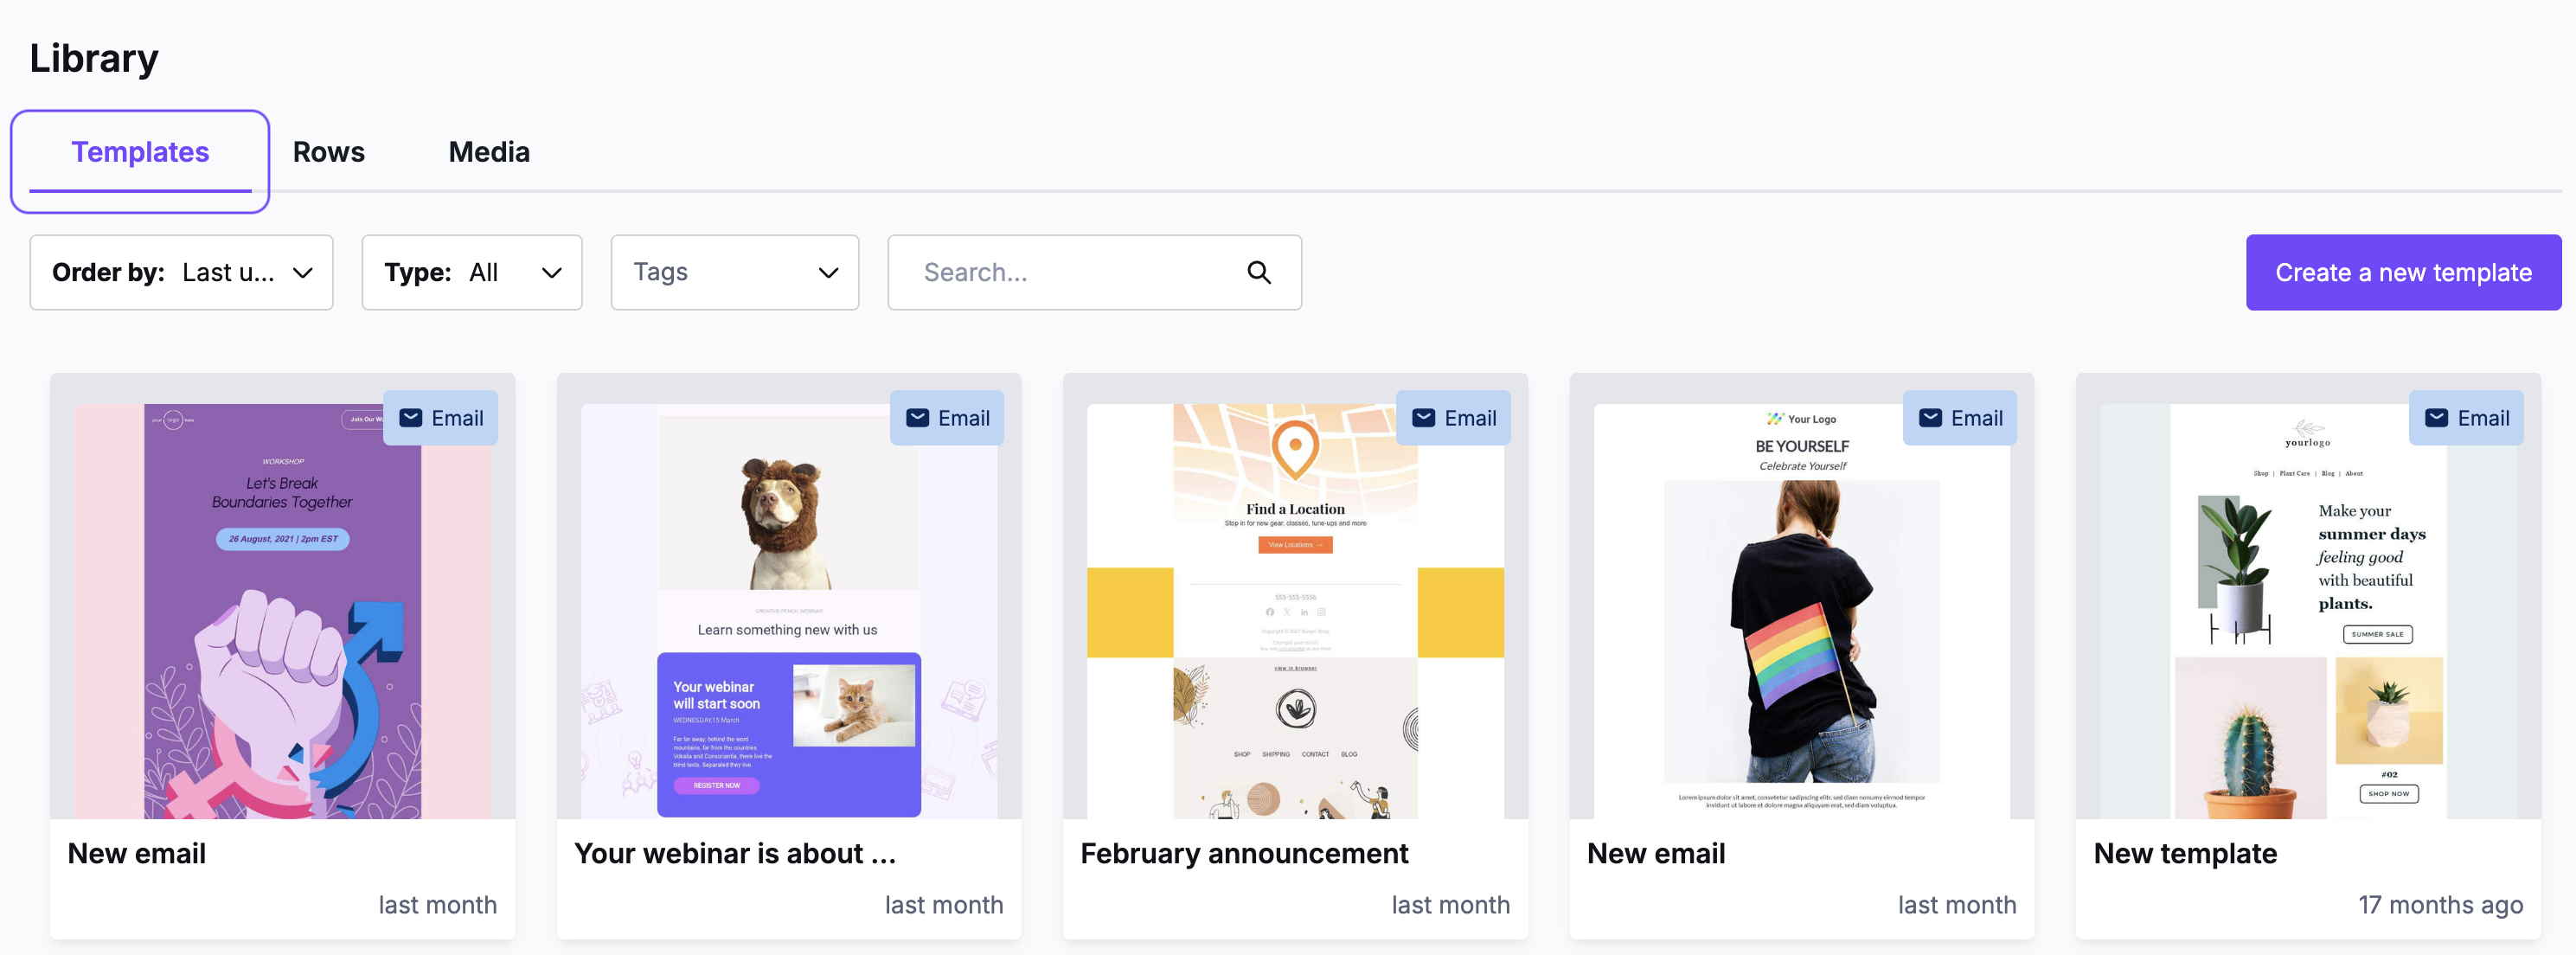
This area acts as your own personal template catalog. You can save templates from the RGE Studio catalog, or you can create your own custom templates.
This area allows you to access the RGE Studio builder. Keep in mind that you will not have as many options while working with templates. For full details, please see Working with custom templates in RGE Studio.
Rows
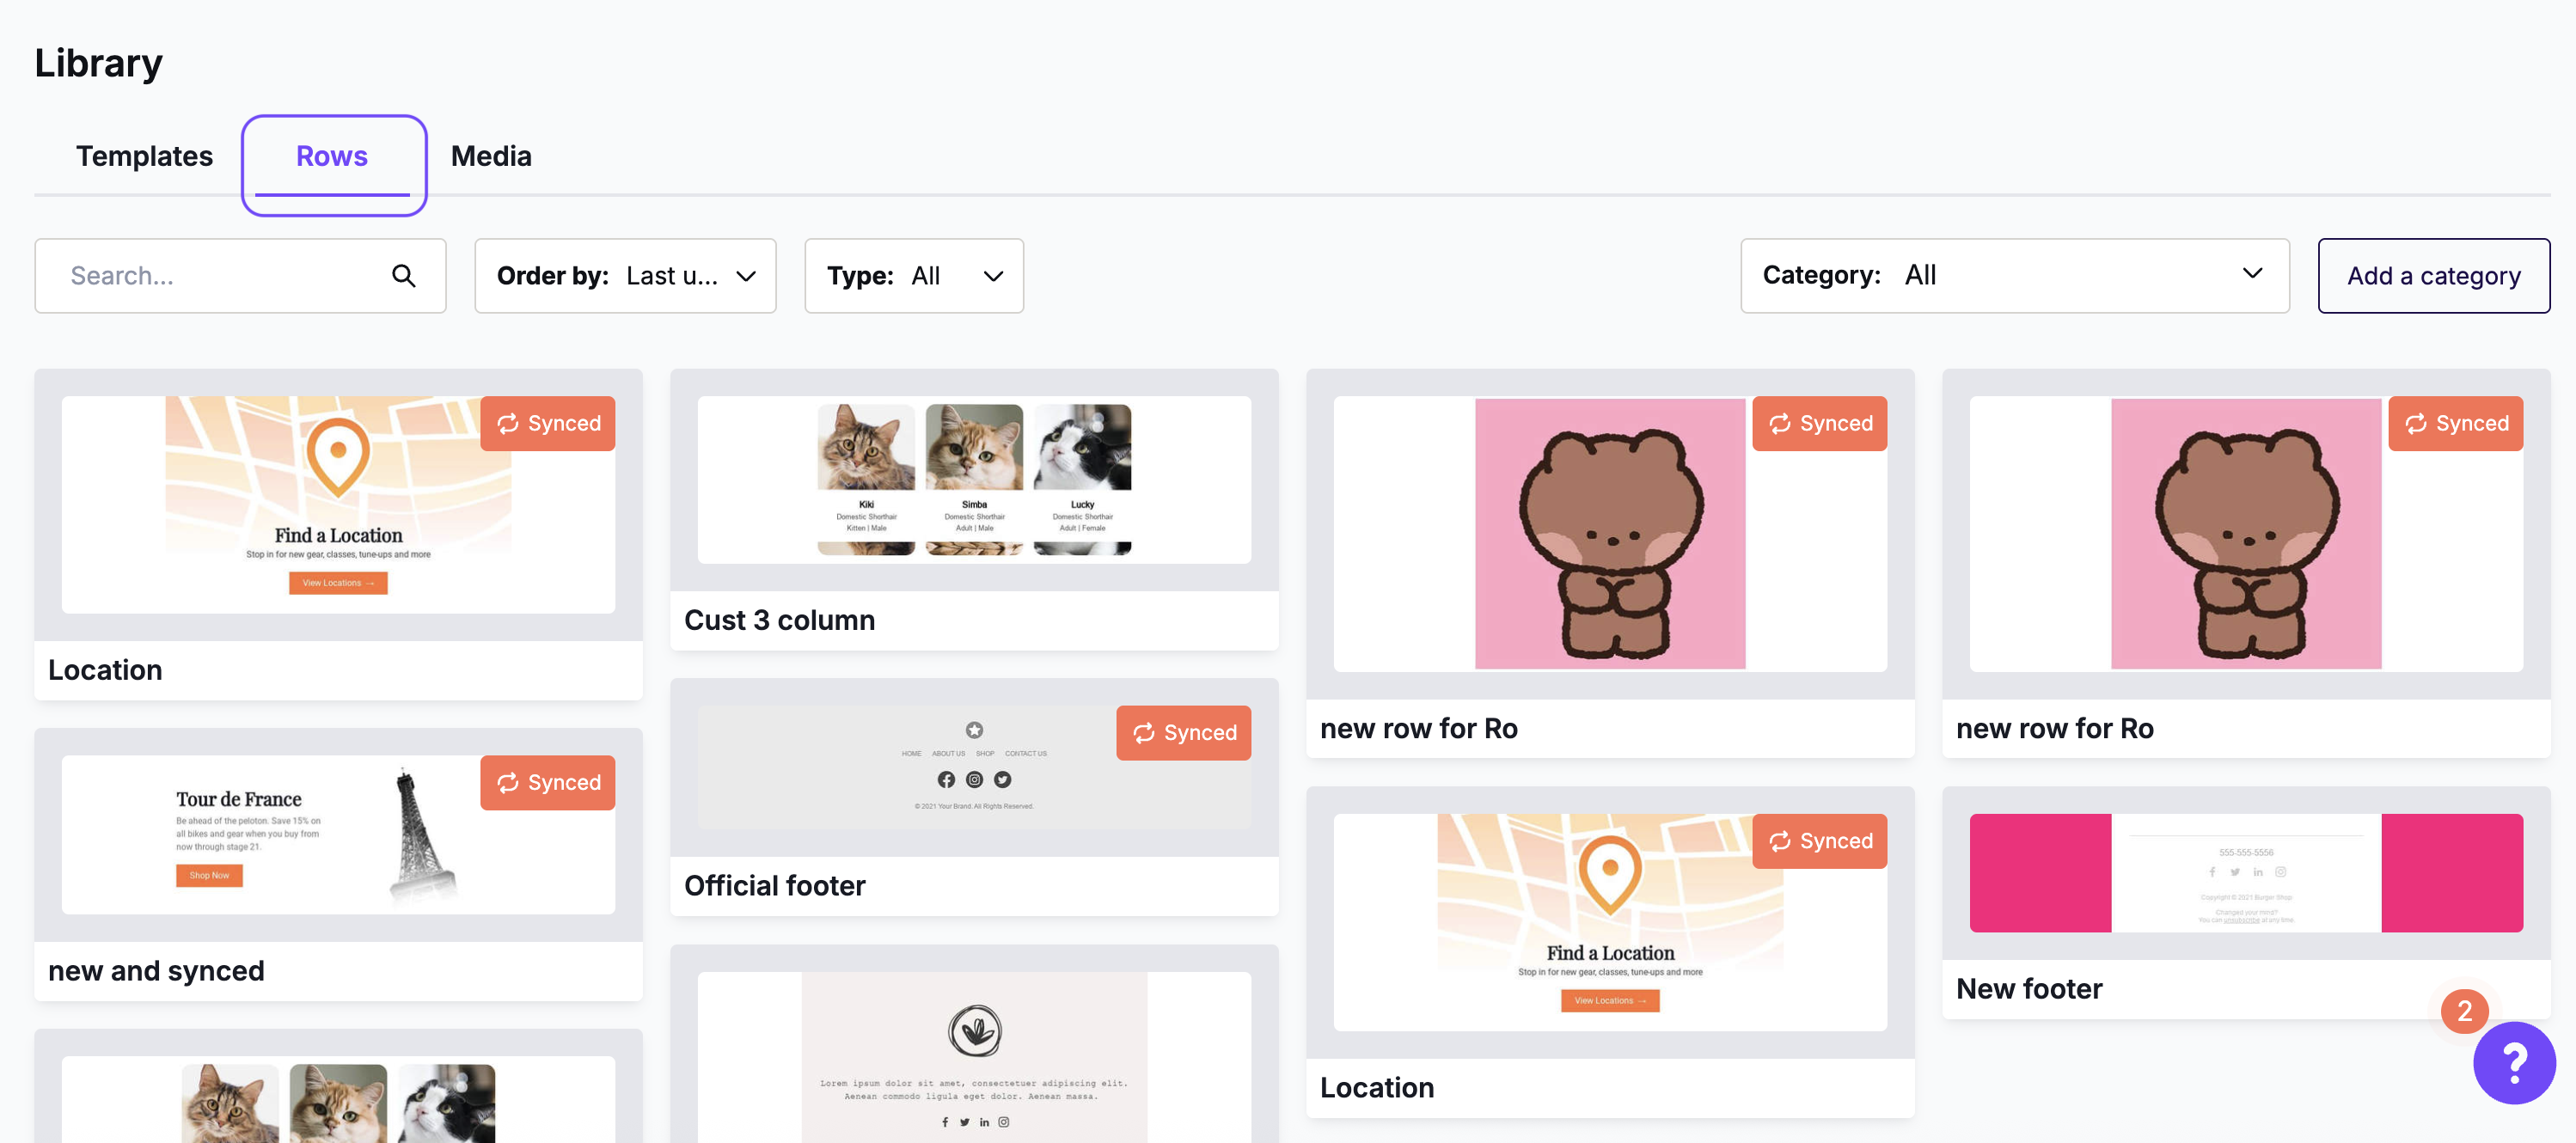
When designing in the RGE Studio builder, you can save individual rows for later use. This allows to easily re-use them in other designs. In this area, you can find a list of all your saved rows. If using a paid account, you can also create categories to organize these rows.
For full details, please see Saved Rows. We also talk about saved rows in our RGE Studio Builder Quick Start Guide.
Media
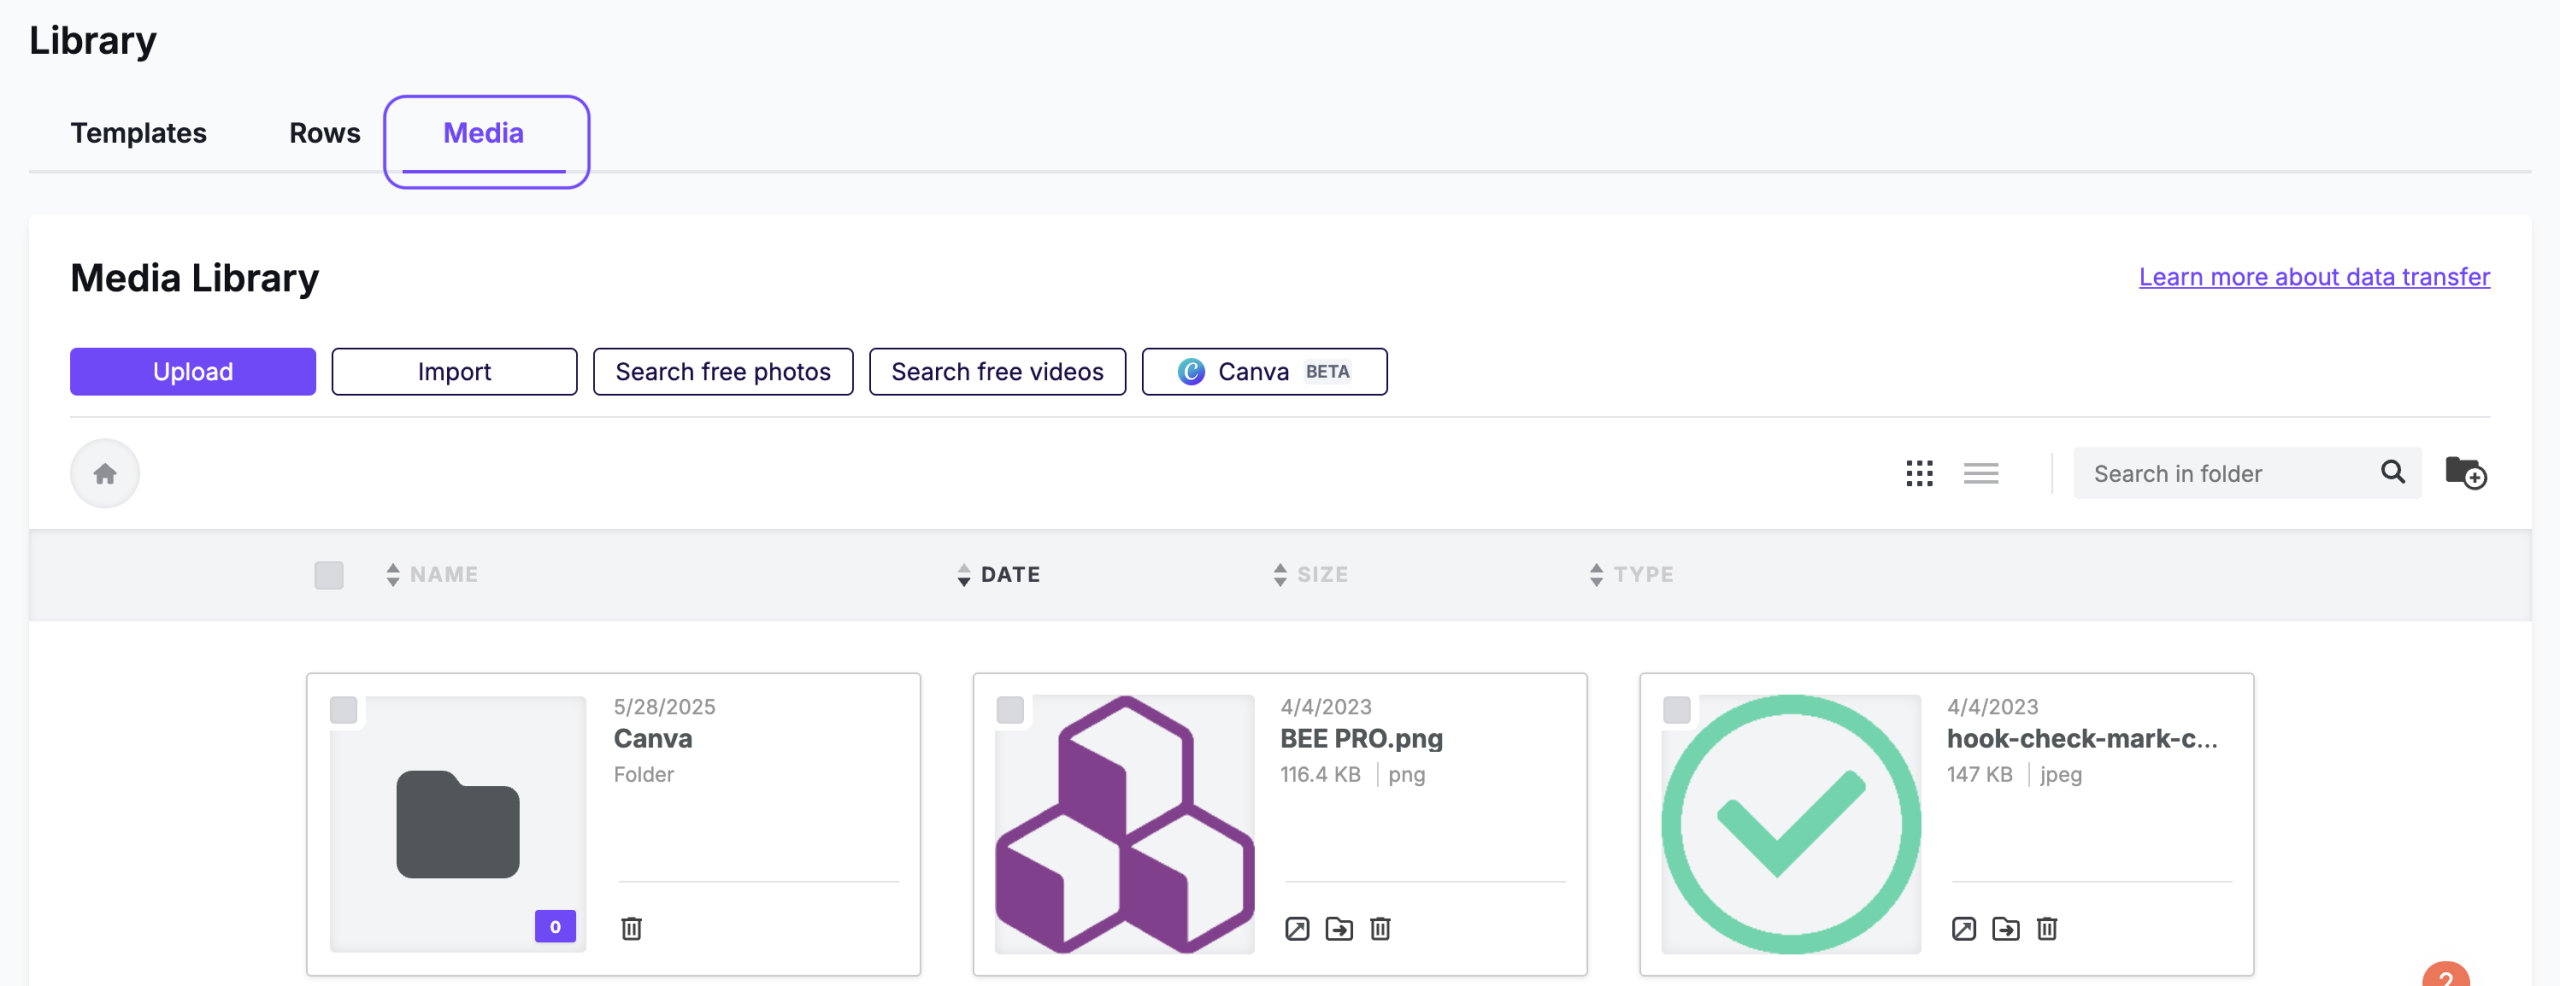
This area opens the file manager, where you can find all the images and files in your workspace.
Here you can import or upload files and navigate them.
Settings
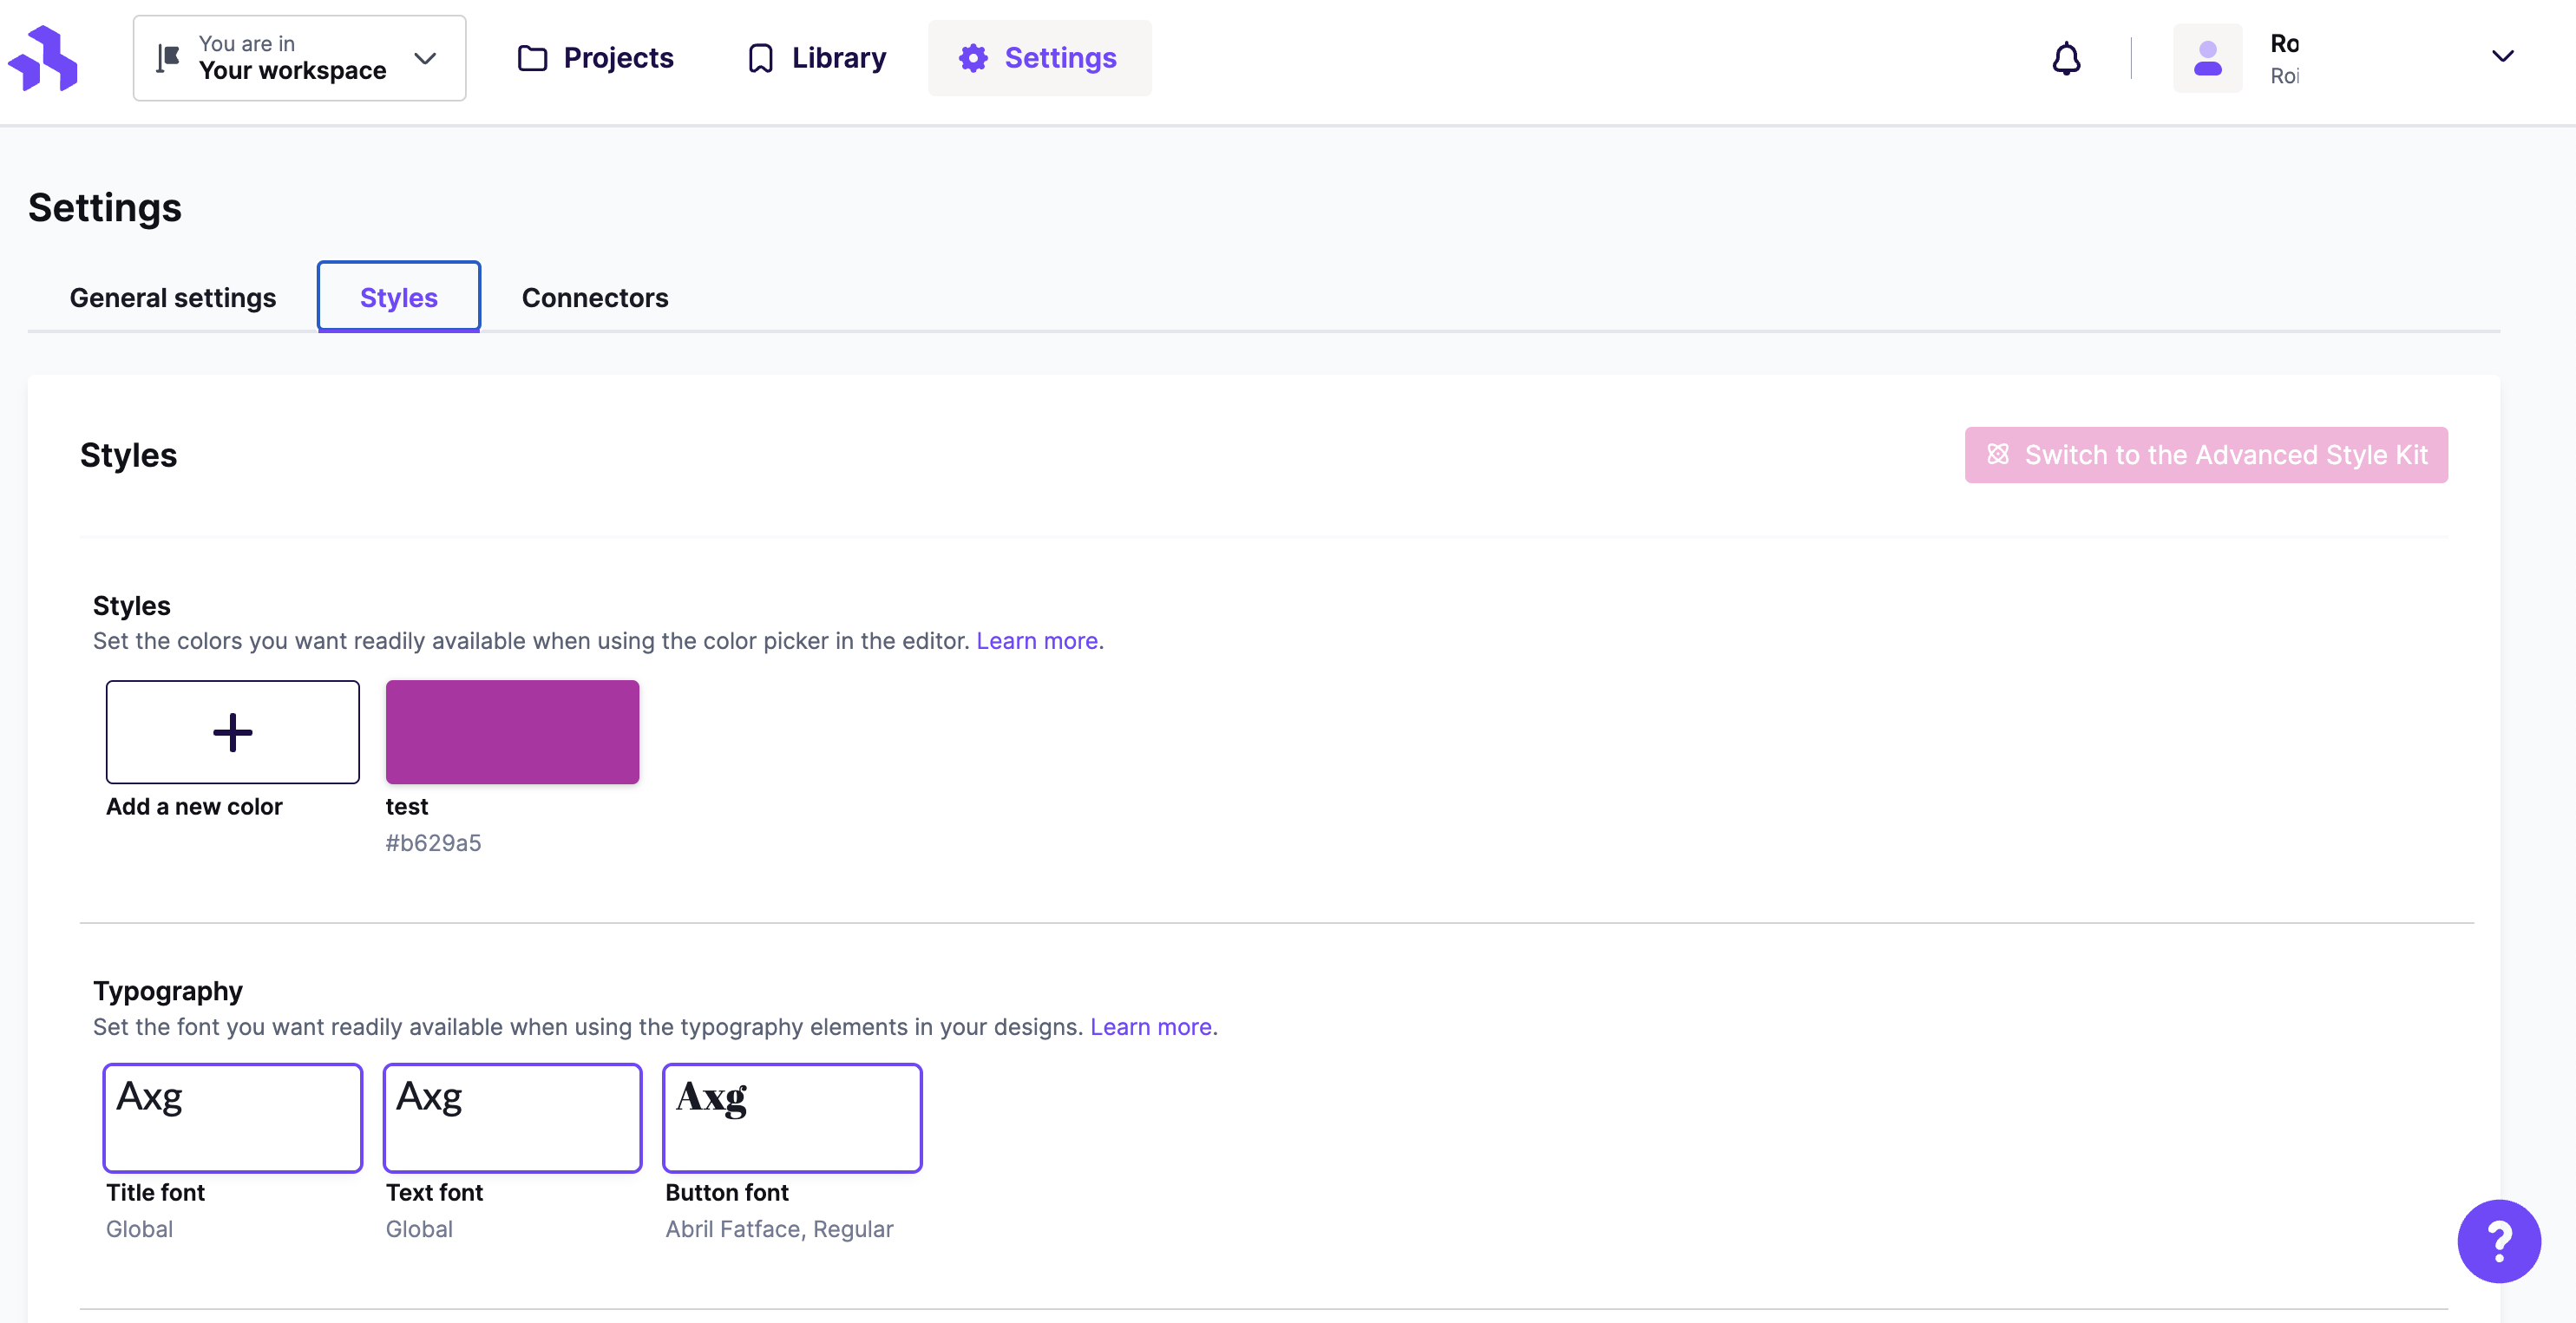
This is where you can find all your RGE Studio account settings. Similar to the Library tab, your Settings are specific to the workspace you select. For full details on the options available, continue to the next guide.
Next: Workspace Settings
If you have any questions, feel free to contact us.
Comments
0 comments
Please sign in to leave a comment.